

Key Takeaways
- Closed-cell spray foam and rigid foam boards are typically the best-performing tiny house insulation options, while fiberglass batts, rock wool insulation, denim insulation, and natural wool batts offer solid alternatives at lower costs
- Your climate zone (DOE zones 1–8), R-value targets, and the limited sq ft of a tiny house all determine which insulation options make sense for your build
- Air sealing to seal air leaks and reduce thermal bridging matters as much as the insulating material itself for comfort and energy efficiency
- Tiny houses on wheels must factor in weight and vibration, which often favors rigid foam insulation and spray foam over heavier materials
- This guide covers where to insulate (roof, walls, floor, doors, windows), what R-values to aim for in 2026, and typical cost ranges per sq ft
- Tiny House Insulation Basics
- How Climate Zone Affects Tiny House R-Value Targets
- How To Insulate A Tiny House: Step-By-Step Overview
- Air Sealing And Thermal Bridging In Tiny Houses
- Most Critical Areas To Insulate In A Tiny House
- Best Tiny House Insulation Options (Material Comparison)
- Weight Limits, Mobility, And Structural Considerations
- What Does Tiny House Insulation Cost In 2026?
- Vapor Barriers, Moisture, And Mold Prevention
- DIY Vs Professional Tiny House Insulation
- Final Thoughts: Choosing The Best Insulation For Your Tiny House
- FAQ
- How long does tiny house insulation typically last before it needs to be replaced?
- Can I mix different insulation types in the same tiny house?
- What if my tiny house moves between very different climates?
- How do I prevent condensation and mold in a highly insulated tiny house?
- Do I really need to meet building code insulation requirements in a tiny house?
Tiny House Insulation Basics
Tiny house insulation matters more than in regular homes. Why? Simple math.
A 200 sq ft tiny house might have 700–900 sq ft of surface area to insulate—walls, roof, and floor combined. That high surface-area-to-volume ratio means heat escapes 4–5 times faster than in standard homes. Every inch of insulation counts.
A tiny house typically ranges from 160 to 400 square feet. Many are built on wheels (THOWs), which adds constraints: limited wall depth (often 2×4 framing), height limits of 13’6” for road travel, and weight restrictions from trailer axles. Understanding these constraints early will shape how you build a tiny house from the trailer up.
Here are the key terms you need to know:
- R-value: Measures thermal resistance. Higher numbers mean better insulation. R-value is a measurement of how well insulation resists heat transfer, with higher values indicating better insulation performance.
- Thermal bridging: When heat bypasses insulation through conductive materials like wood studs or steel trailer frames
- Air sealing: Blocking gaps where air leaks in or out
- Vapor control: Managing moisture to prevent condensation inside walls
Important to understand: insulation does not keep heat in or cold out. It simply slows the transfer of heat, making R-value a critical factor in maintaining consistent indoor temperatures.
This guide uses 2026 data and US Department of Energy climate zones as reference points. The best insulation isn’t one magic product—it’s a system of proper insulation, careful installation, and thorough sealing details working together.
How Climate Zone Affects Tiny House R-Value Targets
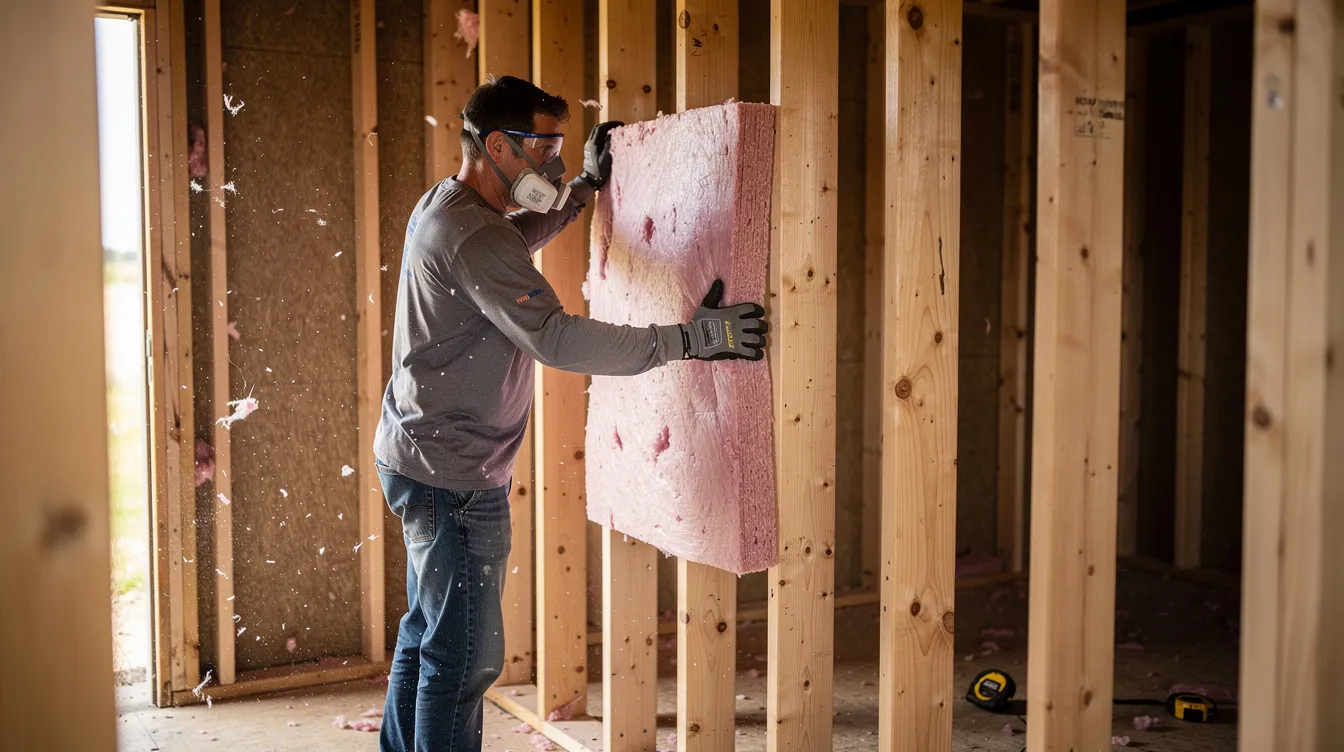
The U.S. Department of Energy divides the country into 8 climate zones, each with specific R-value recommendations for insulation in tiny houses. Zone 1 is hottest, Zone 8 is coldest. The climate zone directly determines how much insulation a tiny house needs, with harsher climates requiring higher R-values to resist heat transfer.
Tiny houses have less thermal mass than larger homes. Temperature swings happen 2–3 times faster. That makes hitting proper R-values even more critical.
R-Value Targets by Climate Zone:
Climate Zone | Wall R-Value | Roof R-Value | Floor R-Value |
|---|---|---|---|
Zones 2–3 (Texas, Florida) | R-13 to R-15 | R-30 | R-19 |
Zone 4 (Midwest) | R-15 to R-20 | R-38 | R-25 |
Zones 6–7 (Minnesota, Montana) | R-21+ | R-49 | R-30+ |
In colder climates, the recommended R-value for walls can be as high as R-20 or more, while in warmer climates, it may be as low as R-13. The R-value of insulation materials is crucial for determining how much insulation is needed based on the climate zone, with colder climates requiring higher R-values for effective energy efficiency. |
Limited wall depth (typically 3.5” with 2×4 framing) pushes builders toward high R-per-inch materials like closed cell spray foam or rigid foam insulation. Adding continuous insulation outside the framing reduces thermal bridging at wall studs and rim joists by 40–60%.
Check your local 2026 building codes. Many tiny houses follow IECC 2021 recommendations or RV standards, though requirements vary by how your tiny home is classified.
How To Insulate A Tiny House: Step-By-Step Overview
Think of your tiny house as a continuous thermal envelope that controls heat, air, and moisture—not just stuffed wall cavities.
Here’s your high-level process:
- Plan R-values based on your climate zone affect on heating/cooling needs
- Air seal all framing joints, penetrations, and gaps before insulating
- Reduce thermal bridging with exterior foam or thermal breaks
- Choose insulation materials that match your depth, budget, and performance goals
- Install insulation in roof, tiny house walls, and floor systematically
- Inspect and test with a blower door or thermal camera to catch gaps
These steps apply whether you’re using fiberglass batts, rock wool, denim insulation, natural wool batts, or spray foam.
Plan early for penetrations—vents, electrical boxes, plumbing runs. Sealing around these later is harder once insulation is in place.
DIY works well for batts and rigid foam boards. Closed cell spray foam typically requires a licensed professional for safety, proper mixing ratios, and performance guarantees.
Air Sealing And Thermal Bridging In Tiny Houses
Here’s the truth: a leaky tiny house with excellent insulation can feel worse than a well-sealed house with average insulation.
Air sealing significantly enhances the comfort of a tiny home and improves the effectiveness of insulation. A leaky tiny house can lead to higher energy costs and discomfort, as air leaks can undermine the performance of insulation, making it less effective in maintaining temperature. Studies show unsealed envelopes lose 30–40% of their energy through convective air leaks alone.
Common air leak locations:
- Around windows and doors
- Wall-to-roof junctions
- Electrical boxes and outlet covers
- Subfloor gaps and rim joists
- Along trailer frames and wheel wells
How to seal air leaks:
- Caulk static joints
- Use specialty tapes at sheathing seams
- Install gaskets behind electrical boxes
- Apply low-expansion foam around framing penetrations
Performing a blower door test can help identify air leaks in a tiny house, allowing homeowners to seal critical junctions effectively and improve overall energy efficiency. A smoke pen also works for DIY leak detection.
Thermal bridging happens when conductive materials bypass your insulation. In tiny houses, this includes:
- Metal trailer flanges conducting cold air
- Closely spaced wood studs (R-4.4 per inch vs R-6+ for foam)
- Steel tie-downs and wheel wells
Strategies to reduce thermal bridging:
- Install continuous insulation (rigid foam) outside studs
- Use insulated skirting around parked tiny houses
- Add thermal break pads under metal connections

Most Critical Areas To Insulate In A Tiny House
In a 200–300 sq ft tiny house, every surface matters. But some contribute more to heat loss than others.
Heat loss breakdown in an uninsulated tiny house:
- Roof/ceiling: 25–30%
- Exterior walls: 25%
- Floor: 15–20%
- Windows and doors: 20–25%
Because heat rises, your tiny house roof insulation and ceiling are the top priority. Walls come next due to their large surface area. Floors matter especially for tiny houses on wheels, where cold air washes underneath the trailer.
A 24-foot THOW parked in Minnesota faces different challenges than one in Texas. Cold climates prioritize high R-value everywhere; hot climates may focus more on shading and radiant barriers, and smart tiny house floor plans that work for you can help place windows, lofts, and storage to support comfort.
Tiny House Roof Insulation
Roofs dominate heat loss. Hot air rises, creating stack effect. Sun exposure adds summer heat gain.
Target R-30 or higher in most climate zones. Zone 6–7 builds should aim for R-38 to R-49.
Roof insulation options:
- Closed cell spray foam under the roof deck (4” = ~R-26)
- Fiberglass batts or rock wool between rafters
- Rigid foam above sheathing for continuous insulation
Tiny houses on wheels face a 13’6” height limit. High R-per-inch materials like cell spray foam help maximize headroom while hitting R-value targets.
Spray foam enables compact unvented roof assemblies if local codes permit—saving the 2–4” needed for ventilation channels. Around skylights and roof vents, air sealing and flashing are critical. These penetrations can account for 10–15% of roof heat loss if poorly sealed.
A Minnesota THOW builder used 4” closed-cell under plywood and maintained 70°F inside at -10°F outside with 50% less propane.
Tiny House Wall Insulation
Typical tiny house wall insulation uses 2×4 framing at 16” on center. That gives you 3.5” of cavity depth.
Maximum cavity R-values by material:
Material | R-Value in 3.5” Cavity |
|---|---|
Fiberglass batts | R-11 to R-13 |
Rock wool | R-15 |
Natural wool batts | R-13 |
Closed-cell spray foam | R-20 to R-23 |
Spray foam adheres directly to sheathing without gaps. Batts require careful fitting—compression cuts R-value by 20%. |
Adding 1” rigid foam insulation outside the sheathing bumps overall wall R-value to R-20+ while reducing thermal bridging through studs by 40–60%.
For interior finishes (shiplap, plywood, drywall), spray foam works well. Batts need proper air barriers behind them.
Tips for best performance:
- Avoid compressing batts around wiring
- Trim foam board tight to plumbing penetrations
- Fill voids completely—a 5% gap reduces effective R-value significantly
Tiny House Floor Insulation
Tiny house floor insulation is critical, especially on trailers and depends in part on your tiny house foundation choices. Cold floors result from:
- Exposed steel framing (conducts heat 50x faster than wood)
- Wind washing underneath
- Ground coupling when parked
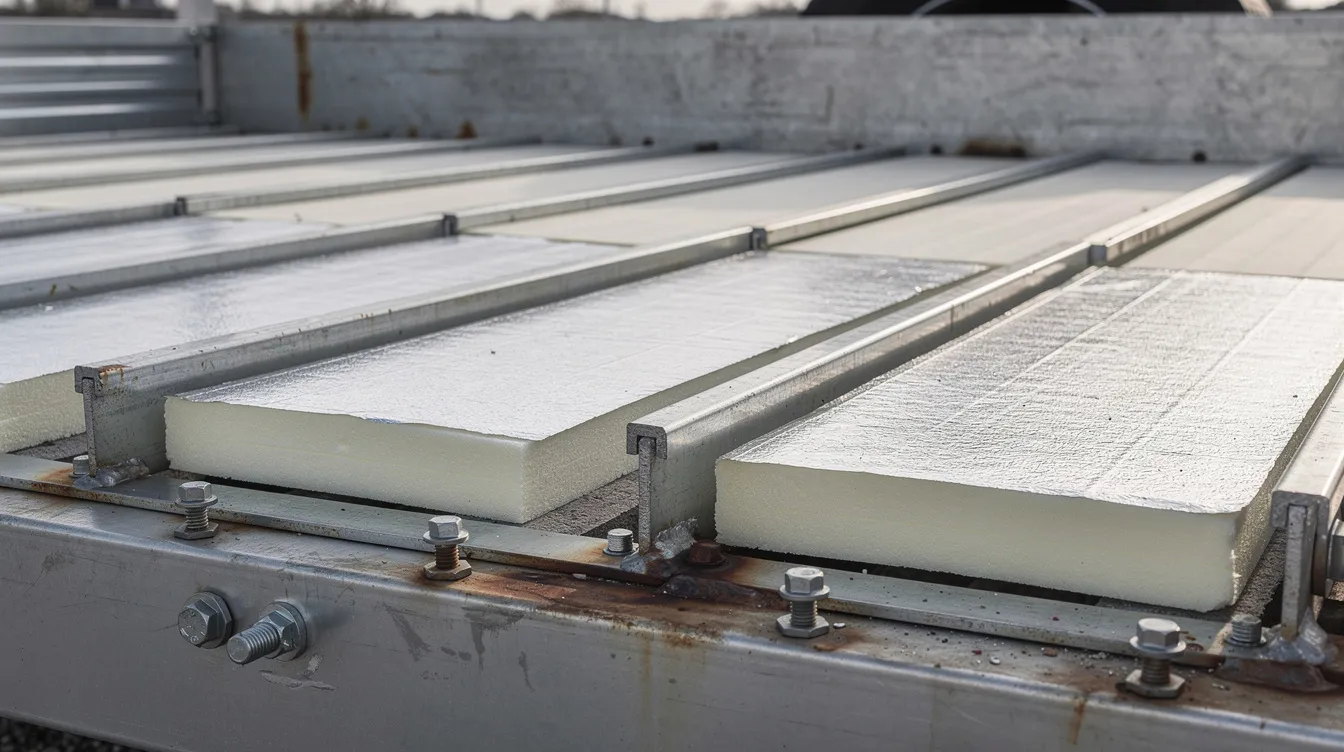
Rigid foam boards (XPS, EPS, or polyisocyanurate foam boards) and closed cell spray foam are primary choices due to moisture resistance and high R-per-inch.
Floor insulation approach:
- Install 2–3” XPS between trailer joists (R-15)
- Add 1” underbelly foam board insulation below joists
- Consider foam board insulation around steel members to prevent thermal bridging
Insulated skirting adds roughly R-10 equivalent protection and cuts wind chill by 40%. Essential for Zones 5–8.
For moisture control, use a vapor barrier or dimple mat above foam to allow drainage. Treated lumber prevents rot where wood contacts insulation.
Insulating Tiny House Doors And Windows
Even triple-pane windows have far lower R-values than walls. Detailing matters.
Glazing options:
- Double-pane (U-0.5): ~R-2
- Triple-pane with low-E coating (U-0.25): ~R-4
Use insulated exterior doors with proper weatherstripping. Apply low-expansion spray foam around window and door frames. Tape and flash properly for air sealing and water management.
Additional treatments:
- Cellular shades add R-3
- Thermal curtains provide moveable insulation
- Exterior overhangs and shading reduce solar gain
In hot, sunny climates, proper shading and low-E glass can matter as much as wall R-value for comfort and energy efficiency.
Best Tiny House Insulation Options (Material Comparison)
There’s no single best insulation for every tiny home. The right choice depends on:
- Climate zone
- Budget
- DIY vs professional install
- Chemical sensitivity
- Weight constraints for THOWs
Quick comparison table:
Material | R-Value/Inch | Cost/Sq Ft (2026) | DIY-Friendly | Best Use |
|---|---|---|---|---|
Closed-cell spray foam | 5.6–8.0 | $2.75–4.25 | No | Roof, walls, floors |
Open-cell spray foam | 3.5–3.7 | $1.75–2.75 | No | Interior, warm climates |
Fiberglass batts | 2.9–3.8 | $0.60–1.20 | Yes | Walls, budget builds |
Rock wool | 3.2–4.1 | $1.30–2.10 | Yes | Walls, fire/sound priority |
Rigid foam boards | 3.8–6.5 | $0.90–2.00 | Yes | Floors, exterior CI |
Denim insulation | 3.5 | $1.60–2.40 | Yes | Eco-builds, low toxicity |
Natural wool batts | 3.6–3.8 | $2.70–3.70 | Yes | Sustainability focus |
Hybrid assemblies work well. Rock wool in wall cavities plus exterior rigid foam insulation is a common approach for R-25+ walls in 2×4 framing, especially when you start with well-thought-out tiny house plans that fit your life. |
Closed-Cell Spray Foam
Closed-cell spray foam insulation offers an R-value of 5.6 to 8.0 per inch, providing excellent thermal resistance and acting as both a vapor barrier and air seal, but its higher upfront price should be weighed carefully in your tiny home cost calculator budget.
This foam insulation is the highest r value option per inch available. At 2.0–2.5 lb/ft³ density, it adds structural stiffening to trailers and adheres without settling during road vibration.
Pros:
- Fills voids 100%
- Acts as air barrier and vapor barrier in one
- Strong adhesion to steel and sheathing
- Excellent moisture resistance
Cons:
- Higher cost ($2.75–4.25/sq ft installed)
- Professional installation required
- VOC off-gassing for 24–48 hours
- Difficult to modify walls later
Spray foam insulation acts as both an air barrier and a vapor barrier, which is particularly beneficial in tiny houses where space is limited and energy efficiency is crucial.
Best uses: roofs and walls in cold climates, floor cavities around steel frames, mobile tiny houses facing road vibration.
Open-Cell Spray Foam
Open cell spray foam delivers R-3.5 to R-3.7 per inch at 0.5 lb/ft³ density. It’s softer, lighter, and often used for sound control.
Pros:
- Expands aggressively to fill irregular cavities
- Good acoustic performance (STC +5 over closed-cell)
- Lower cost than closed-cell
Cons:
- Lower R-per-inch means thicker layer needed
- Absorbs moisture (dries slowly)
- Weak structural contribution
- Needs separate vapor retarder in cold climates
Open-cell works for interior partitions and warmer, dryer climates. Not ideal for thin exterior walls or exposed floors.
Fiberglass Batts
Fiberglass batts provide an R-value of 2.9 to 3.8 per inch and are one of the most budget-friendly insulation options for tiny houses, making them easy to install in standard stud bays.
Pros:
- Low cost ($0.60–1.20/sq ft)
- Lightweight
- Easy DIY installation
- Widely available
- Decent fire resistance
Cons:
- Can sag or leave gaps if poorly installed
- Vulnerable to moisture
- Less effective for air sealing
- Requires PPE for handling
Fiberglass insulation works best for budget builds in moderate climates. Combine with careful air sealing and possibly exterior rigid foam to reduce thermal bridging at wall studs.
Mineral Wool / Rock Wool
Rock wool insulation, also known as mineral wool, delivers an R-value of 3.2 to 4.1 per inch and is resistant to moisture and fire, making it a durable choice for tiny houses.
Pros:
- Maintains shape better than fiberglass
- Resists slumping over time
- Handles moisture without losing performance
- Excellent sound dampening
- Naturally noncombustible (melts at 2150°F)
Cons:
- Costs more than fiberglass batts
- Slightly heavier (0.75 lb/ft³)
- Dusty to work with
Rock wool fits exterior walls, ceilings, and party walls where fire and sound control matter. Pair with exterior rigid foam boards to reduce thermal bridging and keep overall assemblies aligned with affordable tiny house building strategies.
Rigid Foam Insulation Boards
Rigid foam board insulation can provide R-values ranging from 3.8 to 6.5 per inch, making it effective for reducing thermal bridging in tiny houses, especially in sub-floors.
Three main types:
Type | R-Value/Inch | Notes |
|---|---|---|
EPS (expanded) | 3.8–4.0 | Budget-friendly, moisture resistant |
XPS (extruded) | 5.0 | Good moisture resistance |
Polyisocyanurate | 6.0–6.5 | Highest R, but drops 10% at 0°F |
Pros: |
- Lightweight
- Resistant to moisture absorption
- Significantly reduces thermal bridging as continuous layer
- DIY-friendly
Cons:
- Cost varies by type
- Seams leak if untaped
- Environmental impact from blowing agents (improving in 2026)
Best for subfloors, exterior sheathing layers, furring over steel trailer frames, and insulated skirting.
Denim / Cotton Insulation
Denim insulation, made from recycled textile fibers, offers a sustainable option with an R-value of around 3.5 per inch, but it can absorb moisture, leading to potential mold issues.
Pros:
- High recycled content (90%)
- No formaldehyde binders
- No itch or respiratory irritation
- Good sound absorption
Cons:
- Higher cost than fiberglass ($1.60–2.40/sq ft)
- Absorbs 15% moisture
- Can sag if not carefully installed
- Heavier at 1.2 lb/ft³
Best for chemically sensitive occupants, off-grid tiny houses, and interior partitions. Always pair with excellent air sealing and robust moisture control to maintain air quality and avoid mold, and consider how thoughtful tiny house interiors that maximize every square foot can complement your insulation choices.
Natural Wool Batts
Natural wool batts offer R-3.6 to R-3.8 per inch as a premium, renewable option.
Pros:
- Naturally hygroscopic (buffers 12–18% humidity swings)
- Good sound absorption
- Fire resistant (high ignition temperature)
- Low embodied energy
Cons:
- Higher cost ($2.70–3.70/sq ft)
- Limited regional availability
- Requires pest-treated products
Natural wool batts work for tiny houses focused on sustainability, low toxicity, and acoustic comfort. Pair with exterior rigid foam or air-sealing membranes to reach higher R-values in cold climates.
Weight Limits, Mobility, And Structural Considerations
Many tiny houses sit on trailers with 7,000–10,000 lb GVWR limits. Insulation weight adds up.
Approximate weight comparison (300 sq ft surface):
- Spray foam: ~75 lbs
- Fiberglass: ~100 lbs
- Wool/denim batts: ~150 lbs
- Rock wool: ~225 lbs
Rigid foam boards and closed-cell spray foam offer excellent thermal performance at relatively low weight—ideal for THOWs and easy to integrate into many of the best tiny house designs for modern living.
Road vibration causes poorly fastened insulation to settle or compress over time. DOT testing shows loose batts can lose 10–20% effectiveness. Spray foam adheres permanently. Rock wool and dense fiberglass fit snugly and resist movement.
If you’re towing regularly—seasonal moves across states—prioritize lighter, better-bonded assemblies. The higher upfront cost pays off in durability and maintained thermal performance.
What Does Tiny House Insulation Cost In 2026?
Insulation represents a small fraction of total build cost but has major impact on monthly energy bills and comfort, especially in carefully designed tiny homes that redefine small space living.
2026 cost ranges per sq ft of insulated surface:
Material | Cost/Sq Ft |
|---|---|
Fiberglass batts | $0.60–1.20 |
Rigid foam boards | $0.90–2.00 |
Rock wool | $1.30–2.10 |
Denim insulation | $1.60–2.40 |
Open-cell spray foam | $1.75–2.75 |
Natural wool batts | $2.70–3.70 |
Closed-cell spray foam | $2.75–4.25 |
Example calculation: A typical 200 sq ft tiny house has ~750 sq ft of surface area (walls + roof + floor): |
- Fiberglass batts: $450–900 total
- Closed-cell spray foam: $2,000–3,200 total
The main downside of closed-cell spray foam insulation is its higher cost, which can be approximately $2,000 more than other insulation options, but it can lead to significant energy savings over time. Energy-efficient year round operation means lower high energy bills and faster payback.
Factor in operating costs, travel plans, and climate extremes—not just upfront $/sq ft—when choosing insulation materials, particularly if you’re comparing custom builds with tiny homes under $20K for sale.
Vapor Barriers, Moisture, And Mold Prevention
Tiny houses trap humidity fast. Cooking, showering, and breathing in 200 sq ft creates moisture equivalent to 4–6 people in a regular home.
Key definitions:
- Vapor barrier: Blocks moisture movement (perm <0.1)
- Vapor retarder: Slows moisture movement (perm 0.1–10)
- Air barrier: Stops bulk air flow regardless of moisture
These are not the same thing. A vapor barrier stops diffusion; an air barrier stops convection.
Climate-dependent placement:
- Cold climates: Vapor control on interior (warm) side
- Hot-humid climates: Variable-perm membranes or exterior-side control
- Mixed climates: Smart retarders that adjust permeability
How materials handle moisture:
- Closed-cell spray foam: Low perm, acts as vapor retarder
- Fiberglass/rock wool: Don’t stop vapor; need separate barrier
- Denim/wool: Absorb and release moisture but must dry
Best practices:
- Use properly detailed vapor control layers
- Keep assemblies able to dry to at least one side
- Never sandwich absorbent insulation between two impermeable layers
DIY Vs Professional Tiny House Insulation
Many tiny house builders DIY most insulation work. But some tasks are better left to pros.
DIY-friendly insulation materials:
- Fiberglass batts
- Rock wool batts
- Denim insulation
- Natural wool batts
- Rigid foam boards (cut and fitted)
Professional installation recommended:
- Closed-cell spray foam
- Most open-cell spray foam systems
Spray foam requires specialized equipment, safety gear, and experience to avoid off-ratio mixes that create voids or off-gassing problems.
Decision criteria:
- Budget constraints
- Timeline flexibility
- Comfort with PPE and safety procedures
- Learning curve tolerance
- Local contractor availability
Even if hiring pros for spray foam, do your own prep work—tiny home air sealing, backing, and blocking—before the crew arrives. This saves time and money.
Final Thoughts: Choosing The Best Insulation For Your Tiny House
The best tiny house insulation hits your climate zone’s R-value targets, fits within your wall/roof depth and weight budget, and includes meticulous air sealing.
Closed-cell spray foam plus strategic rigid foam insulation often leads on performance. But fiberglass, rock wool, denim, and natural wool batts remain excellent when paired with proper installation details.
Don’t rely on marketing claims. Sketch your specific wall, roof, and floor assemblies. Calculate R-value per layer. Plan how components work together as a system.
Design for future access. Removable interior panels or service chases let you update wiring or plumbing without destroying the thermal envelope.
Match your insulation plan to your lifestyle:
- Stationary vs mobile
- Off-grid vs grid-tied
- Cold vs warm climate
- Chemical sensitivity vs cost priority
Start with your climate zone. Pick your R-value targets. Build from there.
FAQ
This FAQ covers common questions not fully answered above, especially for first-time tiny house builders. Answers assume US-based climate zones and 2026 pricing.
How long does tiny house insulation typically last before it needs to be replaced?
Most insulation lasts decades when properly installed and kept dry:
- Fiberglass and rock wool: 30–50 years
- Rigid foam and closed-cell spray foam: Often the life of the structure (50+ years)
- Denim and natural wool: Inspect more frequently for moisture or pest issues
Key failure triggers include chronic moisture, rodent damage, UV exposure, and structural movement on the road. Inspect accessible areas (under-floor, service chases) every 5–10 years. Any major roof leak or plumbing leak warrants opening that section to check insulation condition.
Can I mix different insulation types in the same tiny house?
Yes. Mixing materials is common and often optimal.
For example: rock wool in wall cavities + rigid foam under the floor + spray foam at wheel wells. R-values are additive—calculate total assembly R by summing layers regardless of material type.
Avoid sandwiching moisture-sensitive insulation (denim, wool) between two vapor-tight layers that prevent drying. Use adhesive materials in high-vibration, hard-to-access spots and DIY-friendly batts in accessible walls.
Keep records of what insulation went where for future maintenance or resale.
What if my tiny house moves between very different climates?
THOWs that spend winters in Minnesota and summers in Texas face both heating and cooling extremes.
Recommendations:
- High R-values in every direction (especially roof and floor)
- Excellent air sealing throughout
- Closed-cell spray foam plus smart vapor retarders that adjust permeability
- Mechanical ventilation (small HRV/ERV) to control humidity in any condition
Avoid assemblies relying on one fixed vapor-barrier position. Design for passive solar and shading where possible to reduce HVAC dependence.
How do I prevent condensation and mold in a highly insulated tiny house?
Condensation happens when warm, moist indoor air contacts cold surfaces—potentially inside walls if vapor control is misplaced.
Three key strategies:
- Continuous air sealing to prevent unwanted air leaks
- Correct vapor control for your primary climate
- Controlled mechanical ventilation or air conditioning to keep humidity between 30–50%
Dense, warm-side insulation (closed-cell foam) on cold surfaces keeps them above dew point. If you notice musty smells, visible mold, or window condensation, improve ventilation immediately and check for thermal bridges or water leaks.
Do I really need to meet building code insulation requirements in a tiny house?
Whether codes apply depends on local classification: permanent dwelling, RV, backyard ADU, etc.
Even if not legally required, building-code R-values provide a good baseline for comfort, resale value, and energy efficiency. Financing, insurance, and parking in certain communities may require code-compliant insulation.
Check with local authorities before finalizing wall thickness. Building at or above code minimums makes sense—upgrading insulation later in a tiny house is far more disruptive than doing it right initially.