
Building a tiny house starts with a clear plan: set your budget, choose a design that fits your needs, confirm local laws and permits, pick a foundation or trailer, frame the structure, finish the exterior and interior, install electrical and plumbing systems, and then decorate and move in. If you’ve been dreaming about tiny living but don’t know where to start, this guide is built for first-time builders, DIY enthusiasts, budget-conscious homebuyers, and families who want a simpler, more sustainable home.
Maybe you’re weighing costs, trying to design a functional small space, or wondering how all the steps fit together. Building a tiny house can feel like a big project, but breaking it into stages makes it manageable and gives you more control over cost, layout, and materials. Ahead, you’ll find practical guidance on planning and budgeting, tiny house designs, permits, foundation and framing, exterior and interior construction, electrical and plumbing, decorating, daily living, maintenance, and even finding the right tiny house community so your dream home works in real life as well as on paper.
- Introduction to Tiny Houses
- Why Build a Tiny House?
- Step 1 – Plan, Plan, Then Plan Some More
- Step 2 – Choose Your Tiny House Design
- Step 3 – Familiarize Yourself with Local Laws
- Step 4 – Build the Base (Foundation or Trailer)
- Step 5 – Get Framing
- Step 6 – Focus on the Exterior
- Step 7 – Work on the Inside
- Step 8 – Install Systems
- Step 9 – Decorate and Move In
- Living in a Tiny House
- Maintaining and Upkeeping Your Tiny House
- Tiny House Communities
- Is Building a Tiny House Worth It?
Introduction to Tiny Houses
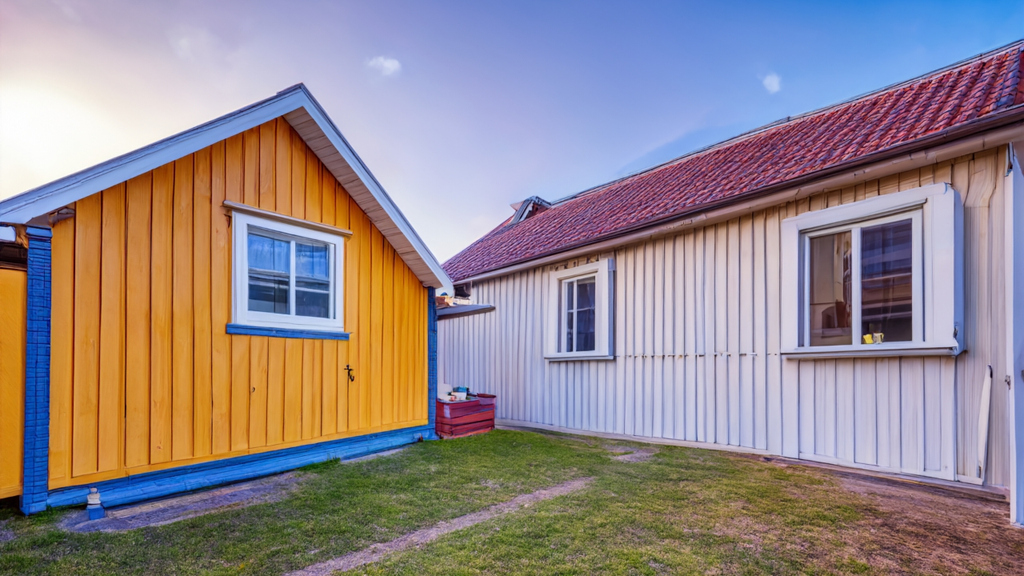
Tiny houses have captured the imagination of people everywhere, offering a unique and affordable way to live with less. Typically ranging from just 100 to 400 square feet, a tiny house is all about making the most of every inch while keeping costs down. Whether you choose to build your tiny house on a foundation or on wheels, you’ll enjoy the flexibility to stay put or take your home on the road.
The tiny house movement is rooted in the desire to simplify life, reduce waste, and live more sustainably. With the average cost of building a tiny house falling between $30,000 and $60,000, it’s no wonder so many people are drawn to this lifestyle as a way to save money on housing costs. Plus, tiny houses can be customized to fit your personal style—whether you dream of a modern retreat or a rustic cabin.
The building process for a tiny house involves careful planning, securing financing, and choosing the right materials and labor. Many people opt for a DIY approach, which can save even more money and add a sense of accomplishment to the project. However, it’s important to note that labor can make up to 30% to 60% of the total project cost for building a tiny house. Tiny houses aren’t just for full-time living—they make great vacation homes or rental properties, too, giving you plenty of options for how to use your space.
As the popularity of tiny houses continues to grow, it’s important to understand both the benefits and the challenges of tiny living. With the right plan and a bit of creativity, building your own tiny house can be a rewarding adventure that helps you save money and create a home that truly fits your needs.
Why Build a Tiny House?
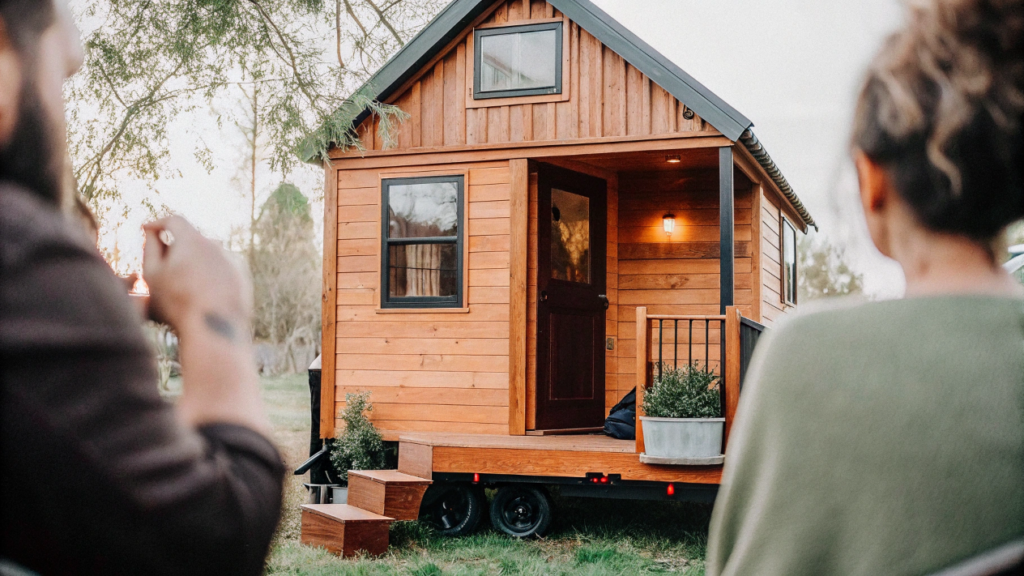
Before starting, think about your reasons for wanting a tiny house. Understanding your “why” will keep you motivated when things get tough.
- Are you after financial freedom?
- Do you want less clutter or a smaller environmental footprint?
- Are you looking for better mobility with a house on wheels?
Knowing what’s driving your decision will shape the choices you make—from your layout to the materials. The cost and design of a tiny house ultimately depend on the needs and preferences of each person.
Benefits of Tiny Living
Building a tiny house is definitely worth the effort. Here’s why so many people are making the move toward smaller living spaces:
- Budget-Friendly Living – With lower costs for housing and maintenance, long-term savings add up. However, tiny houses are not always cheap per square foot compared to traditional homes.
- Freedom to Travel – Choose a mobile tiny house and your home can go wherever life takes you.
- Simple Living – Having a smaller space encourages less clutter and more intentional living.
- Eco-Friendly Solutions – Tiny houses use fewer materials and less energy, which is great for the planet.
Step 1 – Plan, Plan, Then Plan Some More
The first step to building a tiny house is all about planning. The planning phase is a dedicated stage where you organize logistics, budgeting, and design to set the foundation for your project. It’s crucial to create detailed plans before starting construction to ensure every aspect is covered. During the planning phase, you should take into account all potential costs and factors, such as extra fees, time, and necessary supplies. You also need to determine your needs, legal requirements, and budget before moving forward. You should feel comfortable that you’ve procured everything needed for constructing your tiny house before starting. Without a solid plan, things can go sideways fast.
Questions to Ask Yourself
- Do I want my house to be on wheels or a permanent foundation?
- What’s my budget for the entire project?
- How much space do I actually need?
- What permits or legal requirements do I need to check locally?
- Am I preparing a detailed floor plan and making sure I’m ready for local building codes before construction?
Tip for Budgeting
Write down every single cost. Make sure your budget reflects what you can actually afford, so you don’t overextend yourself financially. Include permits, tools, materials, and appliances. If you don’t, surprise expenses could pop up later.
Must-Have Tools for Planning
- Sketching software or good old grid paper for layouts
- A calculator or budgeting app for crunching costs
- A calendar to set deadlines and track progress
Step 2 – Choose Your Tiny House Design
The design sets the foundation (literally). You’re working with a small space, so efficiency is key. Gather design ideas to inspire your layout and decor, ensuring both style and practicality. Creating a detailed floor plan is essential to maximize space and functionality.
With thoughtful design choices, you can transform your DIY project into your dream tiny home.
Popular Tiny House Layouts
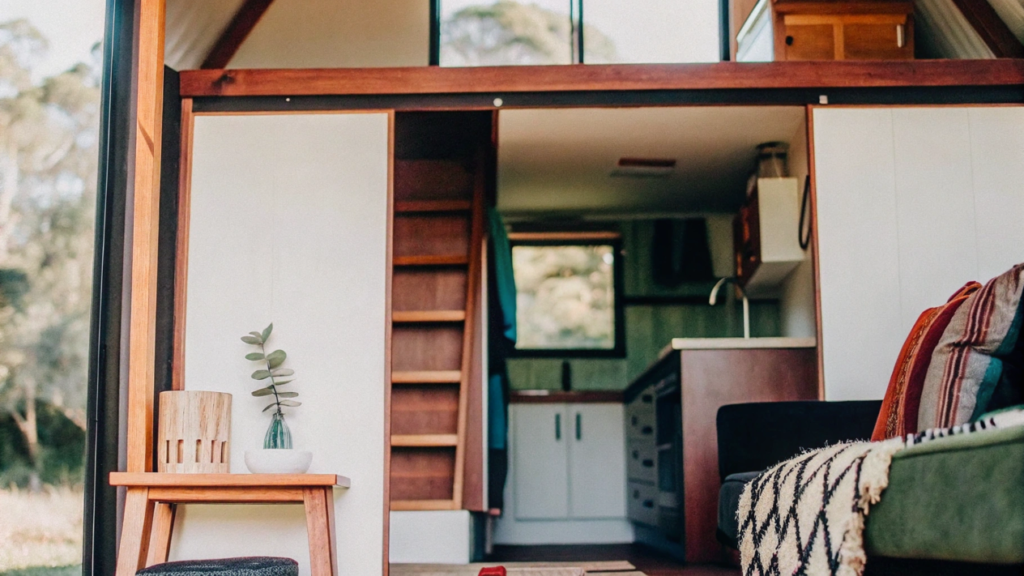
- The Open Concept – Bigger windows and fewer walls to create a spacious feel.
- Loft Bedrooms – Maximize floor space by sleeping above your living area.
- Multi-Use Furniture – Beds that fold into sofas, folding tables, or even desks that double as countertops.
Make sure your design matches your lifestyle. For example, if you work from home, prioritize office space. Love to cook? Then that kitchen better be dialed in.
Selecting the right layout is a crucial part of any diy project, especially when building a tiny house, so spend time reviewing tiny house best design floor plans and ideas before you commit.
Step 3 – Familiarize Yourself with Local Laws
One of the most overlooked steps before building is checking zoning rules and permits. It’s important to talk to your local planning department or zoning officials to ensure you comply with all regulations. Tiny houses aren’t always fully embraced in certain areas.
Start Here
- Look up building codes and minimum square footage requirements for your state or city—these can vary significantly depending on your location.
- Consider how your location will impact where you can park or build your tiny house, as well as which building codes and legal requirements apply.
- Will your tiny house be classified as a recreational vehicle (RV) or a dwelling?
- Are you allowed to park your home wherever you want, or does it need to be on an approved plot of land?
- Many areas prohibit long-term parking of tiny houses, treating them like RVs.
Skipping this step could mean big headaches later on, so research tiny house building codes by state before you finalize your plans.
Step 4 – Build the Base (Foundation or Trailer)
Every strong house needs a strong base. This is where the real action starts. This step marks the beginning of your home construction journey, laying the foundation for your tiny home.
Fixed Foundation Tiny Houses
If you’re building on a plot of land, you’ll want to prepare the site by clearing and leveling the area before laying a proper foundation. It might come as a concrete slab or piers to raise the house off the ground.
Trailer-Based Tiny Houses
A trailer-based option is perfect for mobility, and the trailer foundation is crucial for a mobile tiny house because it must be sized for the home’s full weight. If you plan to use a trailer frame for this type of build, explore the best tiny house trailer brands and look for these features in a trailer:
- Weight Capacity – Make sure the trailer can handle the weight of a fully built house, giving special attention to the frame’s condition and rated load.
- Size Options – Most tiny houses range between 16 to 28 feet long.
- Durability – Choose a trailer built to last. Rust or weak joints are a no-go.
A used trailer can lower costs if it’s inspected carefully. Apply quality metal paint to protect the trailer frame from rust.
Prep Step
If you’re using a trailer, build the floor framing directly onto it, including the floor joists. Anchor it securely to make sure everything stays locked in place when on the road.
Once the floor framing is secure, you can start framing the walls of your tiny house.
Step 5 – Get Framing
Once your foundation is ready, framing the walls is what turns your dream into an actual structure.
- Frame the walls with 2×4 lumber for stability.
- Add studs every 16 inches for even weight distribution, and gather key materials like pressure-treated lumber and exterior siding before you start.
- Don’t forget to leave room for windows and doors!
If you’re not confident in your framing skills, consider hiring a contractor to ensure safety and quality. If you have the experience, you can try diy-ing this step.
This is also where you should start thinking about electricity and plumbing if it’s going inside the walls. Plan the wiring and plumbing paths before nailing everything in.
Tips for Framing Success
- Invest in a reliable saw and power drill.
- Don’t skimp on insulation. A well-insulated tiny house is good for both hot summers and cold winters.
- Triple-check your measurements, and plan wiring and plumbing paths while framing around the bathroom early if one is included.
Step 6 – Focus on the Exterior
Once the frame is complete, it’s time to cover your tiny house from the outside so it’s weatherproof and safe.
- Install siding, such as vinyl, wood, or metal, to protect and finish the exterior; recycled options can work too, as Macy Miller used recycled pallets for her tiny house siding, then add trim around edges and openings.
- Add a reflection barrier as part of the waterproofing and insulation process to improve energy efficiency.
- Install a vapor barrier to prevent moisture ingress and enhance insulation performance.
When selecting materials for your tiny house, opt for high-quality pieces that can offer efficiency and structural rigidity.
Exterior Must-Dos
- Sheathing: Install a layer of plywood or oriented strand board (OSB) on the outer walls for stability, and use 1/2 inch plywood on the roof for added durability.
- Wrap It Up: Add a weather barrier, like house wrap, to shield it from moisture.
- Roofing: Choose lightweight but durable materials like metal roofing or shingles, and note that some tiny house roofs use 1×3 rafters beneath durable roof assemblies. A slanted roof or small overhang can help with rain runoff and keep the home from looking like a plain box.
Step 7 – Work on the Inside
This is the fun part—making it feel like home. This stage involves putting in the finishing touches and essential components, such as flooring, siding, and interior finishes, to complete your tiny house interior.
Insulation and Drywall
Start by insulating the walls and ceiling, making sure to choose high-quality, cost-effective building materials for insulation and wall finishes. You’ve got options like foam boards, spray foam, or even recycled denim insulation. Once that’s done, attach drywall or wood panels to give your interior a polished look.
Tackle Floors
From vinyl to hardwood, pick something durable and easy to clean. Selecting and installing flooring is a crucial step in the interior build, as it should be completed after framing and drywall, and integrated with other finishes like appliances and countertops. This is a small space, so spills and scuffs need quick cleanup options.
Add Personality with Paint and Decor
Pick light, neutral colors so your tiny house feels airy. Use mirrors to make the space feel bigger and bring in personal touches, like awesome decor or reclaimed pieces, to make it uniquely yours.
Step 8 – Install Systems
Electricity, plumbing, and heating systems tie everything together. This is often the most technical (and expensive) part, so here’s how to simplify it: plan your electrical layout early so installation is simpler, safer, and easier to expand later. For complex systems like HVAC, gas lines, and electrical work, hiring qualified professionals is essential to ensure safety, code compliance, and quality.
Think through power needs before you buy materials. Decide whether you want grid versus solar power options, since that choice affects wiring, battery storage, appliance selection, and overall cost.
Water systems also need planning. Map out where fresh water comes in, how gray water drains, and whether you’ll use composting or flush toilets. Keep plumbing runs short when possible to reduce leaks and simplify winterizing.
For heating and cooling, choose a setup that fits your climate, insulation level, and available space. Mini-splits, propane heaters, and electric options can all work depending on your layout and budget.
Before you close up walls, test everything carefully. Electrical and plumbing work often requires scheduled inspections, so build that into your timeline.
Electricity
- Hire an electrician if you’re not experienced—it’s worth the investment for safety, though you may need to pay a significant amount for professional electrical work.
- Use energy-efficient appliances to keep costs low, but remember you may also need to pay more upfront for these appliances.
- Think about solar panels if you want off-grid power.
Plumbing
Do you want running water, or will composting toilets and portable tanks do the job? Decide early. For running water, here’s what you’ll need:
- A water pump and tank system
- Drainage lines connected to local systems or septic tanks
Heating and Cooling
Small spaces heat up and cool down quickly, but they also trap temperatures. Portable heaters, mini-splits, or wood stoves can all work depending on your setup.
Step 9 – Decorate and Move In
Your tiny house is finally built—it’s time to make it yours. Finishing a diy tiny house and moving in is especially satisfying when you build your own tiny home step by step, and staying organized through the process helps save time during the final move-in stage.
Small Space Hacks for Big Style
- Add storage under the bed or sofas.
- Use shelving wherever you can.
- Pick furniture that folds or has hidden compartments.
Make sure all your choices prioritize space-saving designs.
Final Touches
Hang curtains, roll out rugs, and add the finishing décor touches, including a final check around the door. With small spaces, every item has to suit both style and function perfectly.
Living in a Tiny House
Living in a tiny house is a big change, but it comes with some amazing rewards. With less space to work with, tiny house owners quickly learn to be intentional about what they own and how they use every square foot. Downsizing means you’ll need to get creative with storage and find furniture that serves more than one purpose, and it often starts with intentional downsizing for tiny house living long before moving day.
One of the biggest perks of tiny house living is the ability to save money—not just on the initial build, but also on ongoing costs like utilities and maintenance. With a smaller space, you’ll spend less on heating, cooling, and cleaning, and your environmental footprint will shrink, too.
Tiny houses are full of creative ways to maximize space, from built-in shelves to multi-functional furniture that transforms as needed. However, living in less space does come with challenges, such as limited storage and the need to stay organized. Zoning laws and local regulations can also affect where you can park or build your tiny house, so it’s important to do your homework.
Before making the leap, think carefully about your lifestyle and what you truly need in a home. Tiny house living means being mindful of your energy and water use, as well as managing waste efficiently. Despite the challenges, many people find that the benefits—like a clutter-free life and a stronger sense of freedom—make tiny living well worth it. Plus, with the rise of tiny house communities, you can enjoy a sense of connection and support from others who share your passion for simple living.
Maintaining and Upkeeping Your Tiny House
Keeping your tiny house in top shape takes a bit of effort, but it’s essential for a safe and comfortable home. Regular maintenance is key—staying on top of cleaning, organizing, and small repairs will help prevent bigger issues down the road. Make it a habit to check your house’s foundation, roof, and walls for any signs of wear or water damage, and address problems early to avoid costly repairs.
Having a solid plan for maintenance and upkeep is just as important as the initial build. Set aside a budget for routine tasks and unexpected expenses, and keep a list of trusted contractors handy for jobs that require professional help. Good ventilation and keeping your space dry will help prevent mold and mildew, while regular inspections of your roof and foundation will protect your investment.
Tiny house owners should also look for ways to reduce their environmental impact, such as using energy-efficient appliances and being mindful of water use. Consider starting a maintenance fund to cover any surprises, so you’re always prepared. With regular care and attention, your tiny house will remain a cozy, functional, and valuable space for years to come.
Tiny House Communities
Tiny house communities are popping up all over, offering a unique way to enjoy tiny living while connecting with others who share your values. These communities can be as simple as a group of friends parking their tiny houses together, or as organized as a formal development with shared amenities and services.
Living in a tiny house community means you’ll have access to shared resources, skills, and knowledge, making it easier to tackle challenges and find creative solutions. These neighborhoods often include a mix of tiny houses, RVs, and other small dwellings, creating a diverse and vibrant environment.
Tiny house communities can be found in cities, suburbs, and rural areas, each offering a different lifestyle and set of opportunities. Some are designed for specific groups, like seniors or families, while others welcome anyone interested in the tiny house movement. Most communities have their own rules and guidelines to help maintain harmony and ensure everyone’s needs are met.
Being part of a tiny house community means working together, communicating openly, and supporting one another. It’s a great way to enjoy the benefits of tiny living while building lasting connections. As more people embrace the tiny house lifestyle, these communities are sure to become an even bigger part of the broader tiny house movement and small-scale living, offering a sense of security, stability, and belonging for all who join.
Is Building a Tiny House Worth It?
Absolutely. Building a tiny house takes effort, but the rewards—financial freedom, simpler living, and a home you love—are priceless. There’s a unique satisfaction in building your own home from scratch, knowing every detail is your own creation. Whether it’s on wheels or a foundation, how to build a tiny house is about more than just construction. It’s about creating a space that reflects your values and goals.
We hope this post gives you a clear guide to start your project. Now, grab your toolbox and start building your dream!