

Key Takeaways
- A vapor barrier controls water vapor movement through walls, roofs, and floors to prevent condensation, mold, and rot inside your tiny home
- Climate zone determines your strategy: cold zones need interior vapor barriers, hot-humid zones often skip them entirely, and mixed zones use smart retarders
- Closed cell spray foam acts as insulation, air barrier, and vapor barrier in one layer, while rock wool and fiberglass insulation always need a separate vapor control layer
- Proper moisture management is crucial in tiny houses to prevent mold growth and structural damage, especially in humid climates
- Detailing around floors, roofs, windows, and trailer connections matters as much as choosing the right materials
- Introduction: Why Vapor Barriers Matter So Much in Tiny Houses
- Vapor Barrier vs Air Barrier vs Weather Barrier
- How Climate Zone Changes Your Tiny House Vapor Strategy
- Choosing Insulation Materials and Their Vapor Behavior
- Wall Assemblies: Where to Place the Vapor Barrier in Tiny Houses
- Roof and Ceiling Vapor Control in Tiny Houses
- Floor and Trailer Interface: Hidden Vapor Traps
- Windows, Doors, and Penetrations: Keeping the Envelope Dry
- Ventilation, Dehumidification, and Condensation Control
- Common Tiny House Vapor Barrier Mistakes to Avoid
- Putting It All Together: Example Assemblies by Climate
- FAQ
- Do I always need a plastic vapor barrier in a tiny house?
- Is closed cell spray foam enough, or should I add another vapor barrier?
- How does using rock wool change my vapor barrier plan?
- What R values should I target for a tiny house in 2026?
- Can I retrofit a vapor barrier into an existing tiny house with condensation issues?
Introduction: Why Vapor Barriers Matter So Much in Tiny Houses
In a tiny house, moisture problems show up fast.
The interior volume is small. A single shower can spike humidity by 10-20% in a 200 square foot space. Compare that to 2-5% in a standard home. Cooking, breathing, and daily activities add pints of water vapor to your limited space every day.
Here’s the breakdown of key terms:
- Vapor barrier: Blocks water vapor diffusion (≤0.1 perm, like 6-mil polyethylene)
- Vapor retarder: Slows vapor movement (0.1-10 perms)
- Air barrier: Stops bulk airflow through gaps and seams
- House wrap: Exterior weather barrier that sheds bulk water but allows vapor to escape
The U.S. Department of Energy divides the country into 8 climate zones, each with specific R-value recommendations for insulation in tiny houses. Getting vapor control wrong in any of these zones can trap condensation inside your walls.
A 2024 Colorado tiny house (Zone 6) used interior polyethylene over fiberglass plus exterior foam boards. Within 18 months, mold infested 60% of the walls. The sheathing stayed below dew point. The repair cost $12,000.
This tiny house vapor barrier guide walks you through climate strategies, material choices, and the details that keep your build dry, fitting into the broader process of how to build a tiny house.
Vapor Barrier vs Air Barrier vs Weather Barrier
Your tiny home needs three coordinated control layers: one for rain, one for air leakage, and one for vapor.
Weather Barrier (House Wrap) Installed over sheathing, behind siding. Products like Tyvek block rain and reduce airflow but allow vapor to diffuse outward at 50+ perms. Essential for keeping bulk water out of wall cavities.
Air Barrier Can be taped Zip panels, spray foam, or interior membranes. Continuous air sealing often matters more for comfort and energy efficiency than raw r value. Targets: less than 1 ACH50 for tight tiny houses.
Moisture Barrier / Vapor Barrier Controls vapor diffusion based on climate. Typical perms:
- 6-mil poly: ~0.1 perm (Class I)
- Kraft-faced batts: ~0.5-1 perm (Class II)
- Smart membranes: 0.4 to 18+ perms depending on humidity
Insulation Type | Air Barrier? | Vapor Barrier? |
|---|---|---|
Closed cell spray foam | Yes | Yes (at 2”+) |
Open-cell spray foam | Yes | No |
Taped seams only | Varies by type | |
Rock wool | No | No |
How Climate Zone Changes Your Tiny House Vapor Strategy
The climate zone directly determines how much insulation a tiny house needs, with harsher climates requiring higher R-values for effective thermal resistance.
Cold Climates (Zones 5-7) Think Minnesota, Maine, Colorado high country. Vapor drives inward during winter as warm air meets cold surfaces. You need:
- Interior vapor barrier or Class II retarder
- For tiny houses, recommended R-values vary by climate zone, with R-13 to R-21 for walls, R-30 for ceilings, and R-19 or more for floors being common targets
- Taped exterior sheathing as air barrier
Hot-Humid Zones (2-3) Gulf Coast, Florida, coastal Texas. Summer vapor drive reverses. Skip interior polyethylene. Use:
- Vapor-open interior finishes
- Exterior vapor control (stucco or rigid foam)
- Strong dehumidification strategy for humid summers
Mixed-Humid Climates (Zone 4) Nashville, Pacific Northwest. Use smart vapor retarders like MemBrain that tighten in cold winters but open in summer to allow drying. These adapt to seasonal changes automatically.
Mobile Tiny Houses Whether your tiny home is on skids, piers, or a trailer, choosing the best foundation for a tiny house affects how it handles movement and moisture; if you cross climate zones, default to:
- Smart membranes or vapor-open assemblies
- Robust air sealing
- Mechanical ventilation (HRV/ERV)
Choosing Insulation Materials and Their Vapor Behavior
Choose insulation options with vapor characteristics that match your climate, not just the highest r value, and coordinate them with tiny house floor plans that work for you.
Closed Cell Spray Foam Closed-cell spray foam delivers R-5.6 to R-8.0 per inch of thermal resistance, providing a rigid, continuous layer that blocks air and moisture. Acts as both insulation and vapor barrier. Ideal for tight spaces. Closed cell spray foam dramatically increases efficiency, reducing monthly energy costs by about 30%.
Open-Cell Spray Foam Open-cell spray foam provides R-3.5 to R-3.7 per inch, offering moderate insulation at a lower cost but with less moisture resistance. Excellent air sealing but vapor open. Needs a separate smart vapor retarder in cold climates.
Rock Wool (Mineral Wool) Mineral wool insulation provides R-3.2 to R-4.1 per inch, is resistant to moisture and fire, and maintains its shape over time, making it a durable choice for tiny houses. Always needs a complementary vapor control layer.
Rigid Foam Boards Rigid foam boards offer R-3.8 to R-6.5 per inch and are effective in reducing thermal bridging, making them suitable for tight spaces in tiny houses.
- EPS: 3-5 perms, most affordable
- XPS: ~1 perm, moderate
- Foil-faced polyiso: 0.05 perms, best for exterior continuous insulation
Fiberglass and Natural Fibers Fiberglass batts offer R-2.9 to R-3.8 per inch and are the most budget-friendly option for insulation in tiny houses, but they can lose efficiency if not installed properly. Sheep wool and cellulose insulation are vapor open and need membrane-based retarders.
Material | R-Value/Inch | Vapor Barrier? | Cost |
|---|---|---|---|
Closed-cell spray | R-5.6-8.0 | Yes | $$$$ |
Open-cell spray | R-3.5-3.7 | No | $$$ |
Rock wool | R-3.2-4.1 | No | $$ |
Rigid foam board | R-3.8-6.5 | Varies | $$-$$$ |
Fiberglass batts | R-2.9-3.8 | No | $ |
Fiberglass batts may seem like the cheapest way to insulate a home, but they lead to higher energy bills over time. Switching from standard insulation to high-performance insulation in a tiny house adds about $2,000 to your total construction cost. |
Wall Assemblies: Where to Place the Vapor Barrier in Tiny Houses
Tiny house walls are exposed to constant temperature changes, so proper insulation is crucial for maintaining comfort, energy efficiency, and supporting tiny house interiors that maximize every square foot.
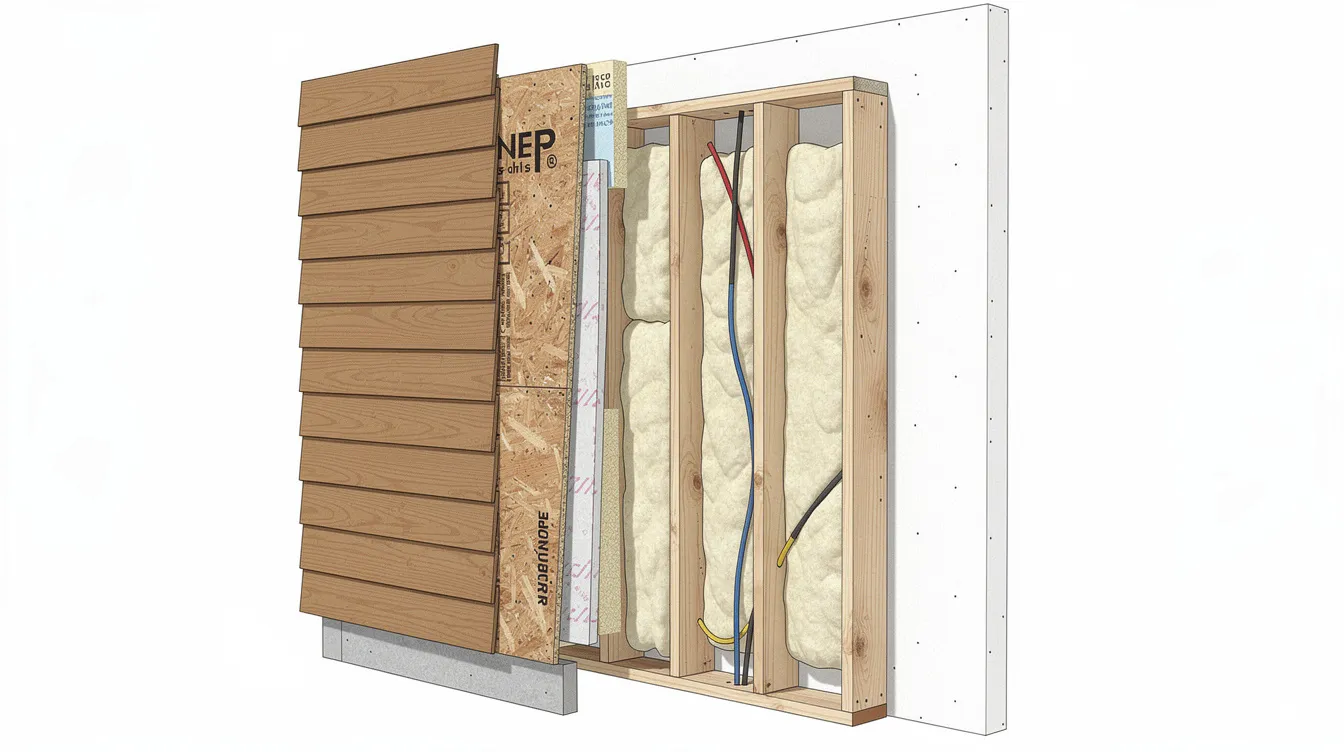
Typical Wall Build-Up:
- Interior finish (plywood or drywall)
- Vapor control layer
- Wall studs with insulation
- Exterior sheathing
- House wrap
- Rainscreen gap
- Siding
Cold-Climate Assembly (Rock Wool) Use a smart vapor retarder behind interior cladding. Tape sheathing seams. Install weather barrier outside. This keeps warm air from reaching the cold surface of exterior sheathing.
Closed Cell Spray Foam Wall The foam insulation itself provides air and vapor control. Skip additional interior poly. Adding polyethylene over closed cell creates a double barrier that traps moist air and causes condensation.
Exterior Rigid Foam Approach Cavity insulation (rock wool or fiberglass) plus 1-2 inches continuous polyiso outside sheathing. Sufficient exterior R value keeps sheathing warm and prevents condensation.
Common Failures:
- Interior poly plus low-perm exterior foam
- Untaped house wrap seams
- Unsealed electrical boxes in wall studs
Use service cavities or careful taping around outlets to maintain your thermal envelope integrity.
Roof and Ceiling Vapor Control in Tiny Houses
The roof is where most energy loss occurs in a tiny house, making it essential to insulate it properly to maintain comfort throughout the year. Heat rises, and your ceiling sees the highest vapor load from cooking and showers, so your roof strategy should align with modern tiny house design ideas.
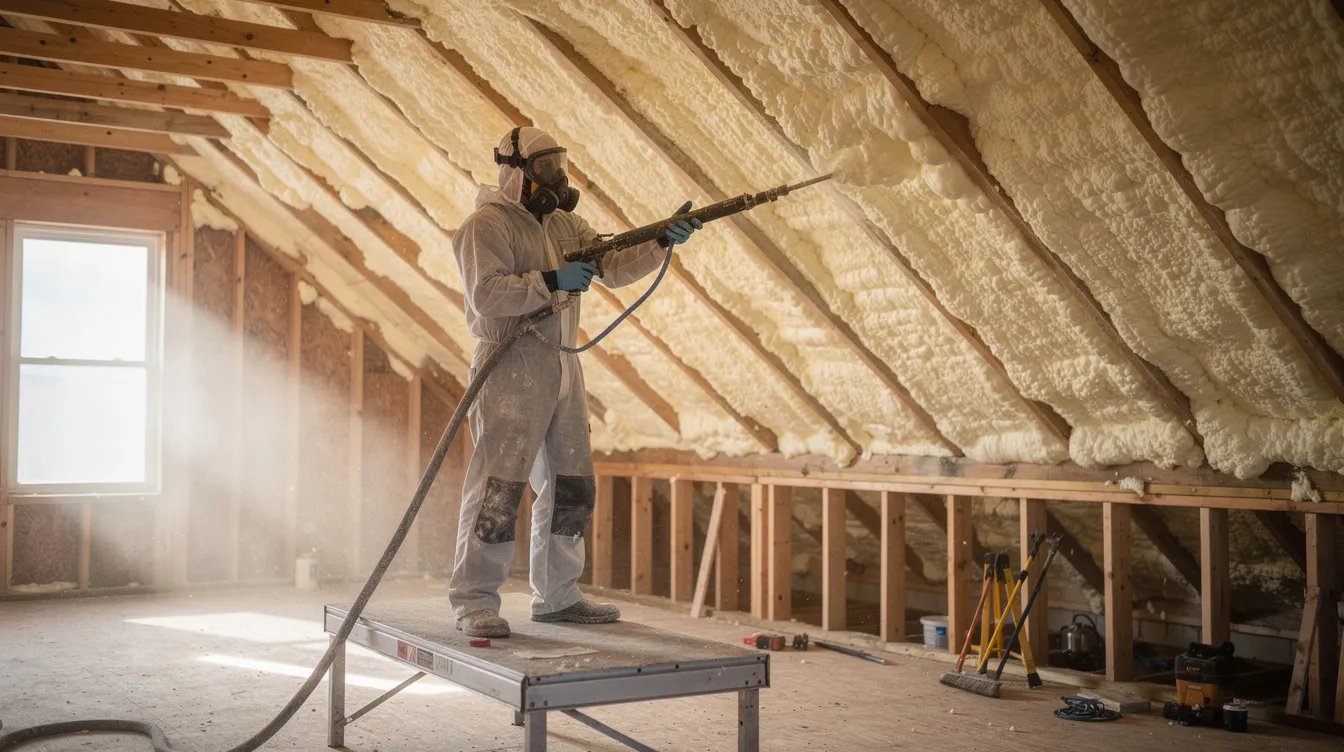
Hot Roof (Unvented) Spray foam directly against roof sheathing under metal roofing:
- No venting needed
- Combined air and vapor control
- High r value in thin profile
- Higher insulation cost upfront
Vented Roof Assembly Rock wool or fiberglass between rafters with vent baffles maintaining an air gap. Smart vapor retarder or painted drywall on ceiling. Allows drying in both directions.
Metal Roofing Considerations Risk of condensation on underside of metal. Use underlayment plus rigid foam or coverboards. Anti-condensate membranes absorb moisture during temperature swings.
Thickness Warning Target R-30+ for most climates. Too-thin spray foam (under 4 inches in Zone 5+) allows dew point issues at the foam-sheathing interface.
Floor and Trailer Interface: Hidden Vapor Traps
Floors in tiny houses are often exposed to cold air from below, making floor insulation vital for increasing comfort, energy efficiency, and achieving affordable tiny house builds.
Trailer Challenges:
- Steel conducts heat 40x faster than wood
- Road spray adds moisture
- Thermal bridges through cross-bracing
Recommended Details:
- Rigid foam boards or closed cell spray below subfloor
- Seal around steel members and cross-bracing
- Protect mineral wool from wind-washing with durable underside sheathing
- Consider zip system panels for airtight seal
Do You Need Floor Vapor Barrier? For mobile tiny houses, prioritize robust air sealing and weather protection over interior poly. The underside faces inclement weather, not indoor vapor pressure.
Condensation on Steel Apply closed cell spray directly on trailer frame. This insulates and prevents condensation by keeping steel above dew point. Addresses thermal bridges effectively.
Target R-19 to R-30 for floors depending on climate. Use foam insulation plus batts to reach targets without excessive weight.
Windows, Doors, and Penetrations: Keeping the Envelope Dry
Windows and doors represent 15-25% of surface area in tiny houses compared to 10% in standard homes. They’re major leak points, and real-world examples from great tiny homes that redefine small space living show how careful detailing keeps them dry and efficient.
Flashing Integration:
- Use peel-stick membranes around frames
- Connect to weather barrier continuously
- Keep bulk water away from wall cavities
Air Sealing:
- Low-expansion foam around gaps
- Backer rod plus quality sealant
- Maintain drying potential to at least one side
Penetrations to Address:
- Mini-split linesets: Use gaskets
- Vents and exhausts: Pre-formed boots
- Electrical inlets: Sealed grommets
Double glazed windows with warm-edge spacers reduce interior condensation. Better yet, triple-pane provides higher r value for your thermal envelope. Thermal curtains add an additional layer of protection against heat loss.
Ventilation, Dehumidification, and Condensation Control
Even perfect insulation and quality insulation details cannot replace mechanical ventilation in a tight tiny home, especially if you’re integrating tiny smart home systems for efficient living.
Ventilation is key in moisture management for tiny houses; installing exhaust fans in areas like kitchens and bathrooms can help reduce humidity levels.
Essentials:
- 50 CFM bath fan, run 15+ minutes after showers
- Range hood vented outside (propane stoves add 1+ gallons of vapor per 10k BTU)
- Small HRV/ERV units maintain air quality without losing energy efficiency
Dehumidification Compact units (70 pints/day capacity) handle humid summers and shoulder seasons when double glazed windows stay closed.
Good Habits:
- Lid on boiling pots
- Dry laundry outdoors when possible
- Target 35-50% interior relative humidity
- Use hygrometer to monitor
Common Tiny House Vapor Barrier Mistakes to Avoid
Typical Errors: When working with professional or DIY builders—including those focused on micro house construction for affordable modern living—it’s easy to overlook basic moisture principles.
- Polyethylene on both sides of wall (traps vapor completely)
- Using closed cell foam in humid climate with impermeable interior paint
- Skipping air sealing “because there’s foam”
- Relying on foil bubble wrap as insulation (real r value is R-1, not R-10)
Unvented Combustion Gas heaters and propane cooktops without exhaust add gallons of vapor daily. Major source of insulation issues.
Sloppy Installation:
- Unsealed electrical boxes
- Untaped sheathing seams
- Holes in smart membranes from finish work
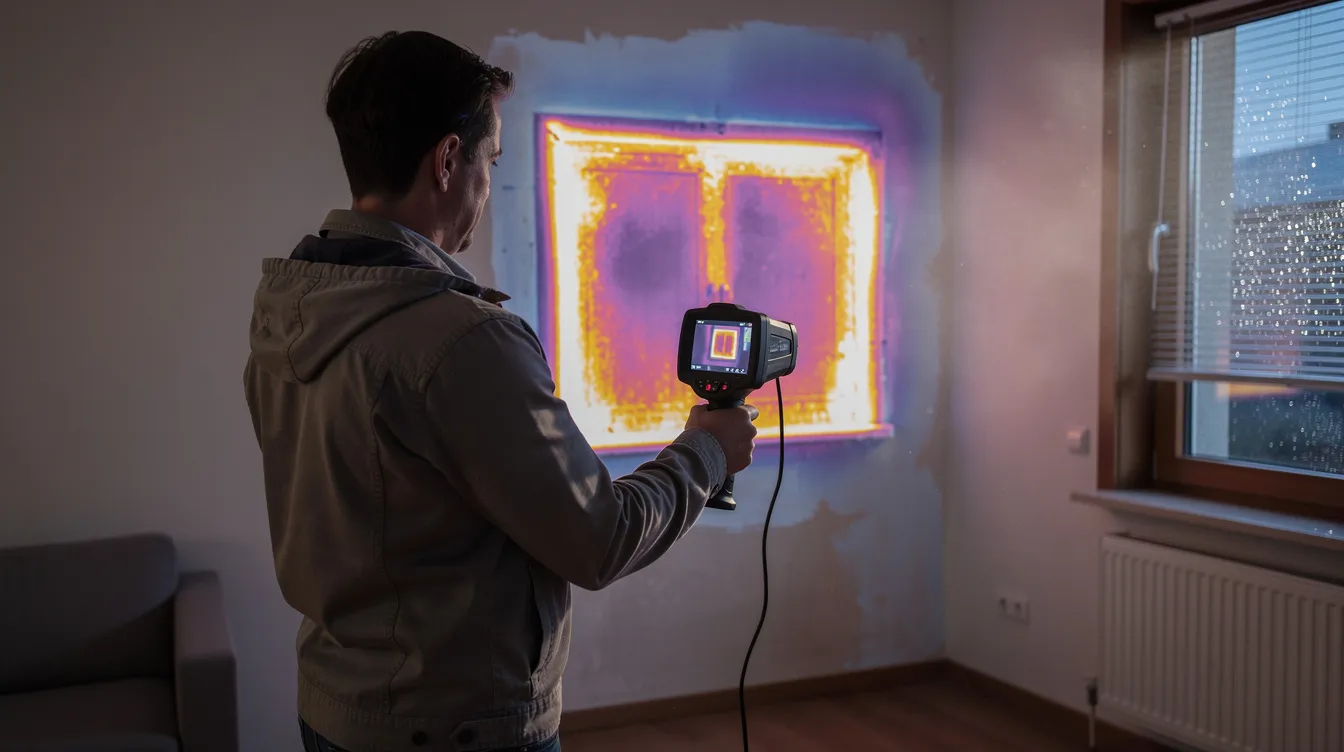
Testing Recommendation Blower door test before interior finishes. At minimum, use smoke pencils or infrared camera to find air leaks. Perfect installation matters more than right materials alone.
Putting It All Together: Example Assemblies by Climate
Cold Climate (Zone 6, New England)
- Walls: 4” closed cell spray foam (R-26), taped Zip sheathing
- Roof: 6” closed cell (R-40), metal roofing
- Floor: 2” XPS under subfloor, closed cell on trailer steel
- No interior poly needed
Mixed-Humid (Zone 4, Nashville/Portland)
- Walls: Rock wool R-15 in 2×4 cavity, smart vapor retarder interior, 1.5” exterior polyiso
- Roof: Vented assembly, rock wool R-38, smart membrane ceiling
- Floor: R-19 batts protected by rigid foam boards below
Hot-Humid Coastal (Zone 2-3, Gulf Coast)
- Walls: Open-cell R-15, no interior poly, exterior R-10 foam
- Roof: Reflective metal, foam boards, robust dehumidification
- Strong ERV ventilation strategy
Adapt these to your trailer design, local codes, and energy efficiency goals, and pair them with colonial tiny house designs for cozy living if you prefer traditional styling. Your thermal envelope is only as good as its weakest detail.
FAQ
Do I always need a plastic vapor barrier in a tiny house?
No. 6-mil polyethylene is appropriate for cold climates on the warm interior side. In mixed or humid zones, it can trap moisture and cause damage. Smart vapor retarders or vapor-retarding paints are often safer choices that adapt to conditions.
Is closed cell spray foam enough, or should I add another vapor barrier?
Properly applied closed cell spray foam at 2+ inches provides both air and vapor control. Adding interior poly creates a double barrier and raises condensation risk. Using spray foam insulation can help manage moisture effectively as it acts as a vapor barrier, sealing gaps and preventing air infiltration.
How does using rock wool change my vapor barrier plan?
Rock wool is moisture resistant but vapor open. It always needs a complementary vapor control layer matched to your climate zone—typically a smart membrane, kraft facing, or well-detailed drywall with vapor-retarding primer.
What R values should I target for a tiny house in 2026?
Target R-13 to R-21 for wall insulation, R-30+ for roofs, and R-19+ for floors. Higher values in Zones 5-7. Limited cavity depth in tiny houses makes high r value spray foam especially valuable for achieving these targets.
Can I retrofit a vapor barrier into an existing tiny house with condensation issues?
First diagnose the problem: locate dew points, find air leaks, check for missing proper insulation. Then consider interior smart membranes, added rigid foam board on exterior, or selective closed cell spray foam. Better ventilation often solves more than simply adding interior plastic everywhere.