
Key Takeaways
- Attaching a tiny house to a trailer means creating a permanent, bolted connection between your wooden floor system and the steel trailer frame. This is not cargo strapping—it is structural marriage designed for highway speeds and years of use.
- Start with a purpose-built tiny house trailer, not a light-duty utility trailer. Confirm weight capacity (GVWR), dimensions, and that your total height stays under 13.5 ft in most U.S. states as of 2026.
- The basic building process is: prepare and level the trailer, build and dry-fit the floor frame, drill and bolt the floor to the trailer frame, then add insulation, subfloor sheathing, and wall tie-downs.
- Safety essentials include corrosion-resistant bolts, proper spacing along all frame rails, secure wall anchor points, and regular inspections before each tow.
- Smart planning now—routing for plumbing, wiring, and future solar panels—prevents expensive rework later in your tiny house build.
- Introduction: Why Attachment Matters for Your Tiny House on Wheels
- Choosing the Right Trailer Frame for a Tiny House
- Planning Your Tiny House Floor System on the Trailer
- Preparing and Leveling the Trailer Before Attachment
- Building the Floor Frame: Joists, Rim Boards, and Protective Layers
- Step-By-Step: How to Attach the Floor Frame to the Trailer
- Securing Walls and Roof to the Trailer Frame
- Insulating, Sheathing, and Protecting the Underside
- Safety, Legal, and Maintenance Considerations
- Planning for Off-Grid Systems and Solar Panels on a Trailer-Mounted Tiny House
- FAQ: Attaching a Tiny House to a Trailer
- Do I need a professional engineer to approve my tiny house trailer attachment?
- Can I safely use an old camper or utility trailer frame for my tiny house?
- How many bolts should I use to attach the floor frame to the trailer?
- Is welding the tiny house frame to the trailer better than bolting it?
- When in the build should I install insulation and the finished subfloor?
Introduction: Why Attachment Matters for Your Tiny House on Wheels
The trailer frame is your foundation. For a road-legal tiny house, how you attach the structure to that metal frame determines whether your home survives at 65-70 mph or tears apart in a crosswind.
Think about the forces involved. At highway speeds, aerodynamic loads can exceed 500 lbs of lateral shear on a 24 ft structure. Your floor, walls, and roof must transfer those forces directly into the steel chassis through bolted connections—not straps or screws alone.
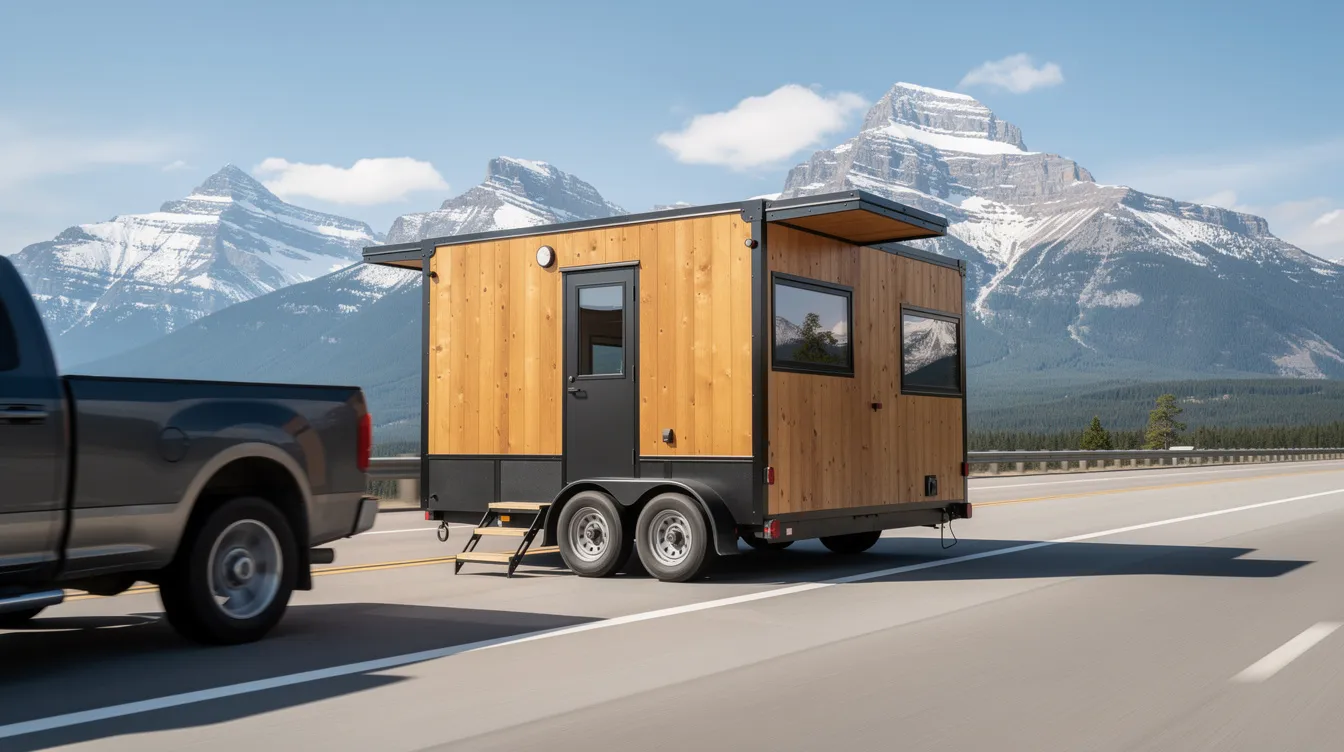
Tiny house trailers are not generic flatbeds or camper trailers. Purpose-built models feature continuous 4-6 inch C-channel or I-beam main rails, cross members spaced 16-24 inches apart, and perimeter flanges specifically designed for through-bolting. This guide focuses on how to attach a tiny house to a trailer for common 20-28 ft bumper pull trailers used in North America around 2024-2026. The principles apply globally, but adapt for your local regulations, whether you’re inspired by cozy Swedish tiny houses for compact living or other international styles.
Choosing the Right Trailer Frame for a Tiny House
A purpose-built tiny house trailer is strongly preferred over converting a used camper or utility trailer, and it should be matched with the best foundation choice for your tiny house based on where and how you plan to use it. New trailers from reputable manufacturers come with welded steel runner beams, flanges for joist bolting, and documented ratings. A tiny house trailer typically weighs between 8,000 to 16,000 pounds and is built with reinforced steel or aluminum frames to ensure durability and longevity.
Key specs to confirm:
- GVWR matching finished house weight plus 30% margin (e.g., 14k GVWR for 10k lb tiny home)
- Axle count and rating (dual 5.2k-7k lb axles for 24 ft homes)
- Most tiny house trailers use a tandem axle setup, which provides better weight distribution and stability during movement
- Brake type (electric or hydraulic)
- Deck height under 18 inches to hit 13.5 ft total height
Trailer types and attachment differences:
Type | Market Share | Best For | Deck Height |
|---|---|---|---|
Bumper pull | ~80% | Standard builds, simpler overhangs | Lower |
Gooseneck | ~15% | 28+ ft builds, superior stability | 6-12” higher |
Deck-over | ~5% | Seamless joist runs | Varies |
Look for integrated features: 3-inch side flanges, 12-gauge runner beams, and pre-drilled 1/2-inch holes. Request documentation of all ratings from the manufacturer—these numbers drive your structural base calculations. |
Planning Your Tiny House Floor System on the Trailer
Design your floor framing and trailer frame as a single system, integrating tiny house floor plans that fit your life and tiny house floor plans that work for you. They must work together, not just fit together.
Lumber and joist specifications:
- Using 2×6 joists for the floor provides a strong structure that can support the weight of a tiny house, especially when the trailer frame lacks solid metal framing along the perimeter
- 2×8 floor joists work well for heavier builds
- Kiln-dried Douglas fir or SPF rated at 1,200 psi bending strength
- Space joists 16 inches on center
- Maximum overhang beyond the outer edge of steel rails: 6-12 inches
Align wood joists directly over steel cross members. This prevents unsupported spans and creates predictable drill locations through both materials.
Planning for utilities:
- Pre-plan 4×4 chases for 2-inch ABS drain pipes (slope 1/4 inch per foot for greywater)
- Route 1.5-inch EMT conduit for wiring
- Keep plumbing and electrical runs away from bolt line locations
Account for total stack-up: 7-inch joists + 5.5-inch insulation + 3/4-inch T&G plywood + 1-inch vinyl = approximately 14.25 inches. This affects your interior ceiling height under the 13.5 ft road limit and should be factored into your overall tiny home budget and cost planning and considered alongside the broader steps of how to build a tiny house.
Preparing and Leveling the Trailer Before Attachment
Accurate leveling is essential. If the trailer flexes or tilts, your walls will never be plumb and loads will not transfer evenly into the frame.
Steps to prepare:
- Park on firm, compacted ground (concrete or gravel)
- Position heavy-duty jack stands at all corners and mid-span (rated for your GVWR)
- Use 4×4 cribbing under stands to prevent sinking
- Check level side-to-side and front-to-back with a 4 ft spirit level
- Aim for 1/8-inch variance over 8 ft maximum
Surface preparation:
- Wire brush all rust and loose paint from the steel
- Apply PB Blaster to stubborn corrosion
- Prime with cold galvanizing compound (93% zinc) for 10-year corrosion resistance
If adding a protective metal layer above the frame, pre-cut and dry-fit those sheets now. Many builders lay 26-gauge 5V crimp roofing upside-down to shield the wood from road spray.
Building the Floor Frame: Joists, Rim Boards, and Protective Layers
The floor frame can be built directly on the trailer or assembled on the ground in sections, then lifted into place.
When constructing the floor, it is recommended to build it in several pieces if it exceeds 12-15 feet in length, allowing for easier handling and installation on the trailer frame. For a 24 ft build, divide into rear (8 ft), axle (8 ft), and front (8 ft) sections.
Construction sequence:
- Lay 2×6 or 2×8 joists perpendicular to the trailer, 16 inches on center
- Install doubled 2×10 rim boards around the perimeter for stiffness and wall nailing
- Sister joists over fenders for clearance
- Square each section by measuring diagonals—both measurements should match within 1/4 inch
A recommended method for attaching a tiny house to a trailer involves adding a metal layer of protection on top of the trailer before installing a 2×4 subfloor, which is then bolted to the trailer’s steel flanges and runner beams. A common method for constructing a tiny house floor involves adding a metal layer of protection on top of the trailer before attaching a subfloor, which helps secure insulation materials in place. Options include thin galvanized metal sheeting, 5V crimp roofing, or exterior-grade plywood attached with self-tapping screws.
Step-By-Step: How to Attach the Floor Frame to the Trailer
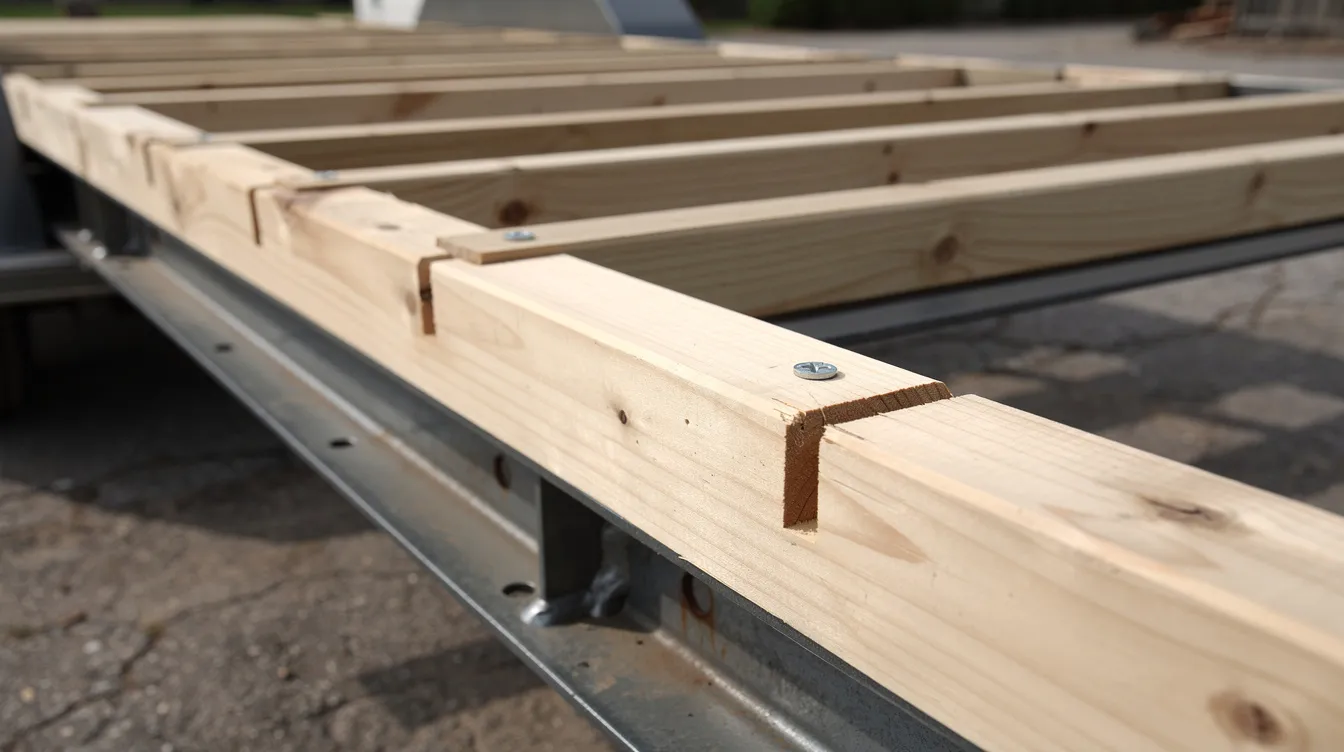
Through-bolting is the primary method for securing a tiny house floor to a steel trailer frame. When constructing a tiny house, it is crucial to secure the framing to the trailer using heavy-duty bolts and to ensure that the trailer frame is level before attaching the subfloor.
Positioning the floor:
- Place each framed section on the leveled trailer
- Ensure equal overhangs (typically 6 inches front and rear)
- Maintain 1-inch clearance around fenders
- Align the front section with the tongue
Drilling and bolting:
- Clamp the wood floor frame firmly to steel rails before drilling
- Use a metal-capable drill with step bits (Unibit style works well for steel)
- Drill through rim board, floor joist, protective metal layer, and trailer cross member
- Space holes every 24-36 inches along outer rails
- Add bolts at all corners and at every major cross member intersection
Fastener specifications:
Component | Specification |
|---|---|
Bolt grade | Grade-5 or Grade-8, galvanized or stainless |
Diameter | 1/2 inch or 5/8 inch |
Length | 5-6.5 inches (depending on stack-up) |
Hardware | Double washers, locking nuts |
Torque | 60-90 ft-lbs |
Add wood gussets or blocking around bolt locations to prevent splitting. Re-check floor level and square after tightening early bolts—shifts of 1/16 inch are common if you skip this step. |
Securing Walls and Roof to the Trailer Frame
The tiny house must connect to the trailer at multiple levels: floor, wall bottom plates, and upper structure.
Wall attachment:
- Anchor bottom plates (doubled 2×4 pressure-treated) to rim boards with 3-inch structural screws
- Use Simpson H2.5A hurricane ties (rated 1,800 lb uplift) at 8-12 points around the perimeter
- Position ties at corners, fender ends, and every 6 ft along walls
Full load path continuity:
- Install continuous threaded rod running from trailer frame up through studs to top plates and rafters
- Space rods every 6 ft for high-wind or frequent-towing scenarios
- Simpson DTT2Z straps add redundancy with 2,000 lb lateral hold-down capacity
Pre-engineered steel framing systems or hybrid wood-steel systems can reduce weight and simplify consistent connection points across floor, walls, and roof, especially when you’re exploring top custom tiny homes for small-space living and other great tiny homes that redefine small space living.
Insulating, Sheathing, and Protecting the Underside
Once the floor is bolted down, install insulation and subfloor sheathing while protecting the underside from moisture and debris.
Insulation options:
Type | R-Value | Pros | Cons |
|---|---|---|---|
Rigid XPS foam | R-5 per inch | Easy install, moisture resistant | Requires gaps sealed |
Mineral wool batts | R-4.2 per inch | Fire resistant, sound dampening | Needs vapor barrier |
Closed cell spray foam | R-6.5 per inch | Air seal, structural support | Higher cost |
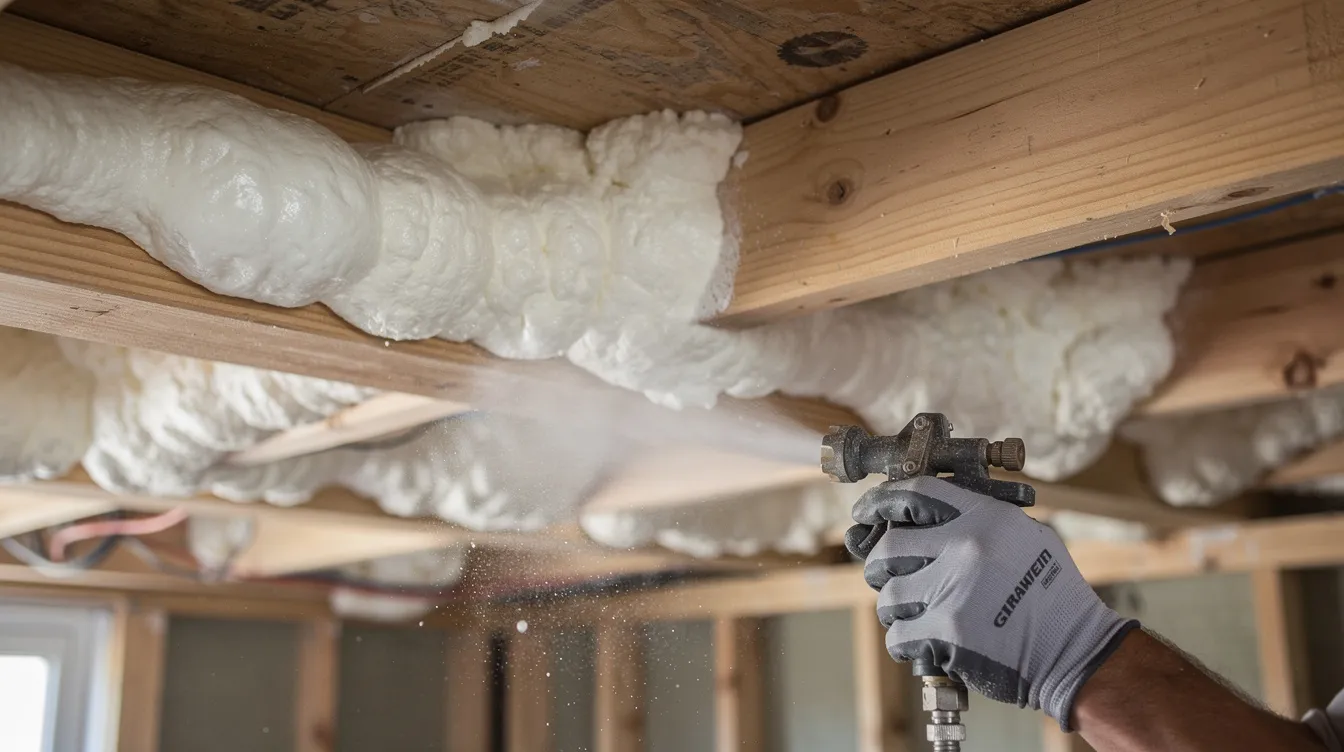
Closed cell spray foam insulation is often recommended for tiny houses due to its ability to create a strong air seal and provide high R-value per inch, making it effective for energy efficiency. Using a consistent thermal envelope is crucial in tiny house construction, as it helps maintain comfort by minimizing heat loss. | |||
Insulation should be installed in a way that prevents thermal bridging, which occurs when materials with high thermal conductivity, like metal, allow heat to escape, thus reducing the overall efficiency of the insulation. |
Using closed cell spray foam insulation allows for a method where a subfloor is added directly on the trailer, followed by a corrugated plastic layer attached later, which simplifies plumbing installation and maintenance and works well with self contained tiny homes for modern off-grid living and tiny smart homes that maximize efficient living.
Subfloor installation:
- Use 3/4-inch tongue-and-groove plywood (Advantech or similar)
- Apply construction adhesive to joists
- Secure with 2-inch #8 screws every 6 inches at edges, 12 inches in field
For the underside, cover exposed insulation with corrugated poly panels or aluminum sheathing to protect against rodents and road debris.
Safety, Legal, and Maintenance Considerations
A tiny house on wheels is regulated as a vehicle load. It must meet road-safety standards beyond building best practices.
Legal requirements:
- Maximum width: 8.5 ft (102 inches) without permit
- Tiny house trailers must comply with Department of Transportation regulations, and a permit is not required if the trailer is under 8 feet 6 inches wide; however, a wide load permit is necessary if it exceeds 102 inches
- Total height: 13.5 ft in most U.S. states (California allows 14 ft)
- Required equipment: fender lights, reflectors, safety chains, breakaway brake systems
When to consult professionals:
- Homes over 20 ft or exceeding 10,000 lb finished weight
- Non-standard overhangs or unconventional trailer frames
- Insurance or registration requirements demanding stamped plans
Maintenance checklist before each tow:
- Inspect all visible bolts, nuts, and welds
- Check for rust or corrosion at connection points
- Re-torque fasteners after first 100 miles, then at 500 miles, then annually
- Verify tires, lug nuts, light wiring, and safety chains
Planning for Off-Grid Systems and Solar Panels on a Trailer-Mounted Tiny House
Your attachment decisions impact where and how you mount solar panels, batteries, and utilities, and they should also complement cute tiny house designs for your dream home so structure and style work together. Sustainable living on wheels requires forward planning, just as thoughtful tiny house designs for modern living and affordable tiny house designs and tips balance structure, layout, and systems from the start.
Roof load considerations:
- Standard solar panels weigh 40-50 lbs each
- Plan roof framing to transfer panel weight down through walls into bolted rim boards
- Rafters must carry live loads plus equipment weight
- Route conduit from roof-mounted panels to interior electrical panels without compromising structural posts
Weight distribution for batteries and tanks:
- Locate heavy components (battery banks, water tanks) low and near trailer axles, a strategy also common in micro house builds focused on modern, efficient living
- Keep tongue weight at 10-15% of GVWR to prevent trailer sway, similar to balancing loads in tiny house camper setups for adventure living
- 200Ah LiFePO4 batteries (approximately 100 lbs) work well positioned over the axle line, a common approach in small homes and tiny houses in Washington State where off-grid capability is popular and in tiny house kits from Home Depot used for flexible off-grid setups
Plan power conduit paths during floor framing. Drilling through structural members later creates headaches and compromises your attachment points, especially if you later transition to or park beside tiny house park model homes that integrate more permanent utility connections.
FAQ: Attaching a Tiny House to a Trailer
Do I need a professional engineer to approve my tiny house trailer attachment?
While not always legally required, having a structural engineer review bolt spacing, overhangs, and total weight is highly recommended for full-time tiny houses or homes towed frequently. Some insurers, banks, or jurisdictions require stamped plans for long-term parking or registration, especially for builds exceeding 10,000 lb. A $500 engineering stamp can save you from rejected insurance claims and eventually provide peace of mind.
Can I safely use an old camper or utility trailer frame for my tiny house?
Repurposed frames can work only if the steel is in excellent condition, the GVWR matches your finished tiny home weight, and the frame has been inspected for cracks, rust, and axle health. However, 70% of older camper frames fail DOT inspections due to rust and axle misalignment. For most DIY builders, a new or professionally refurbished tiny house trailer is safer and often cheaper than rebuilding a worn frame from the ground up.
How many bolts should I use to attach the floor frame to the trailer?
There is no universal number—it depends on trailer length, weight, and engineering. Builders commonly place bolts every 24-36 inches along the perimeter and at all key cross members and corners. A 24 ft tiny house might use 20-30 through-bolts. Follow engineering guidance for your specific build rather than copying numbers blindly. More bolts at corners and fender ends provide extra security.
Is welding the tiny house frame to the trailer better than bolting it?
Welding can provide very strong connections when done by a qualified welder, but it creates a heat-affected zone that can weaken surrounding steel if done improperly. Welded connections are also harder to modify or inspect later. High-quality bolted connections are typically preferred for DIY builds because they are inspectable, replaceable, and do not require specialized welding equipment. You can carry spare bolts; you cannot carry a welder.
When in the build should I install insulation and the finished subfloor?
Install insulation and final subfloor sheathing after the floor frame is fully bolted to the trailer and all under-floor plumbing and wiring routes are confirmed. Many builders delay installing expensive finished flooring until the shell is weather-tight. This protects your interior flooring from damage during framing and rough-in work. Nail and screw the subfloor, but save the bed of hardwood or vinyl for last.