

Getting pressurized water flowing in a tiny house doesn’t require a civil engineering degree. It does require understanding how a water pump, storage tank, and water heater work together as a system. This guide walks you through every piece of that puzzle so you can plan, size, and install with confidence.
Tiny house water pump basics (answer the main question fast)
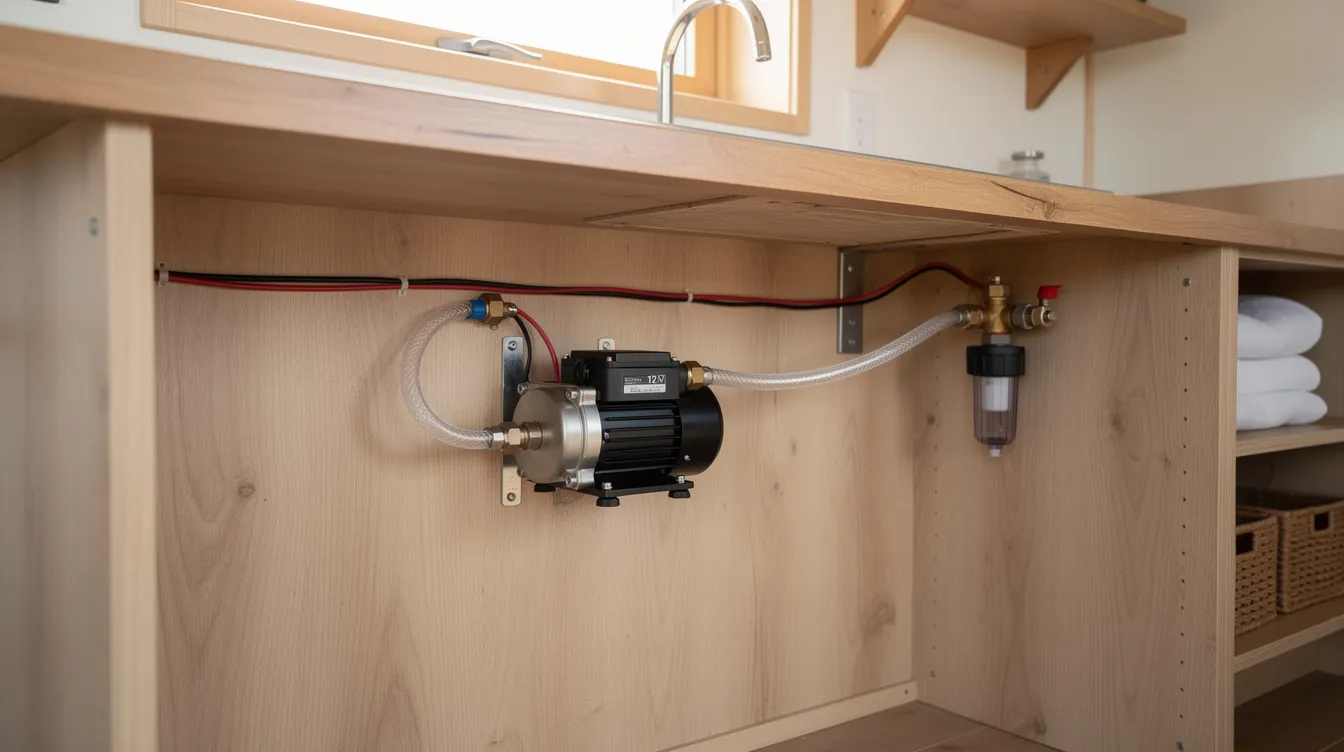
A water pump in a tiny house does one job: it pulls fresh water from a storage tank, pressurizes the supply lines, and pushes that water to your sink, shower, faucet, and water heater on demand. When you open a fixture, the drop in line pressure triggers an automatic pressure switch that tells the pump to run. Close the fixture, pressure builds back up, and the pump shuts off.
For most tiny houses between 120 and 450 square feet, a 12V RV-style diaphragm water pump is the most practical choice. A typical flow rate needed for tiny houses is approximately 2 to 5 GPM, with a shut-off pressure of 40 to 60 psi. Diaphragm demand pumps are self-priming and can run dry without immediate damage, which makes them forgiving for beginners. Comfortable shower pressure in a tiny house generally falls in the 40 to 70 PSI range.
A simple example system looks like this: a 40 to 60 gallon water storage tank tucked under a bench, a 12V diaphragm pump, a small accumulator tank (2 to 6 gallons) to smooth out pressure, a propane tankless water heater mounted near the shower wall, and PEX plumbing running to the kitchen sink, shower, and potentially a compact washing machine. The result is pressurized water on demand, even off grid. Whether your priority is showering, washing dishes, hand washing, or running a small load of laundry with a portable washing machine for a tiny house, this kind of setup handles it.
The right pump depends on whether your tiny house connects to city water (where the pump is often bypassed) or relies entirely on a tank and pump. Many owners design for both scenarios.
Planning your tiny house water system (on-grid vs off-grid)
Pump sizing only makes sense once you know where your water comes from and how much you use. There are three common scenarios.
An on-grid setup means connecting to a city spigot or campground hookup via an RV drinking water hose or garden hose rated for potable use. City water already delivers pressurized water at 40 to 60 psi, so the pump stays off. You just need a pressure regulator to protect your plumbing from surges.
An off grid setup means storing water in a 40 to 300 gallon tank (or larger cistern), using a pump to pressurize lines, and handling greywater separately. Greywater tanks in tiny houses can be as small as 15 gallons, and many owners pair a composting toilet designed for tiny houses with their system to eliminate blackwater plumbing entirely. Using biodegradable soaps reduces greywater pollution, which matters if you drain onto land.
A hybrid approach is the most popular for tiny houses on wheels: an onboard tank plus pump for boondocking, combined with an external hose connection that bypasses the pump when hookups are available. Valves let you switch between the two sources, mirroring how tiny houses get water on-grid, off-grid, and with hybrid setups.
The numbers tell the story. A tiny house can use about 10 gallons of water daily per person with conservation habits, compared to the average American who uses 80 to 100 gallons of water daily. That means a couple in a tiny home might use 20 to 50 gallons per day depending on fixtures and laundry.
Your plan should answer four questions: where does water come from, how much you’ll store, how you’ll heat it, and where waste water goes. Then choose the pump.
Types of water pumps suitable for tiny houses
Several pump types can work in a tiny house, but some fit the constraints of space, power, and budget far better than others.
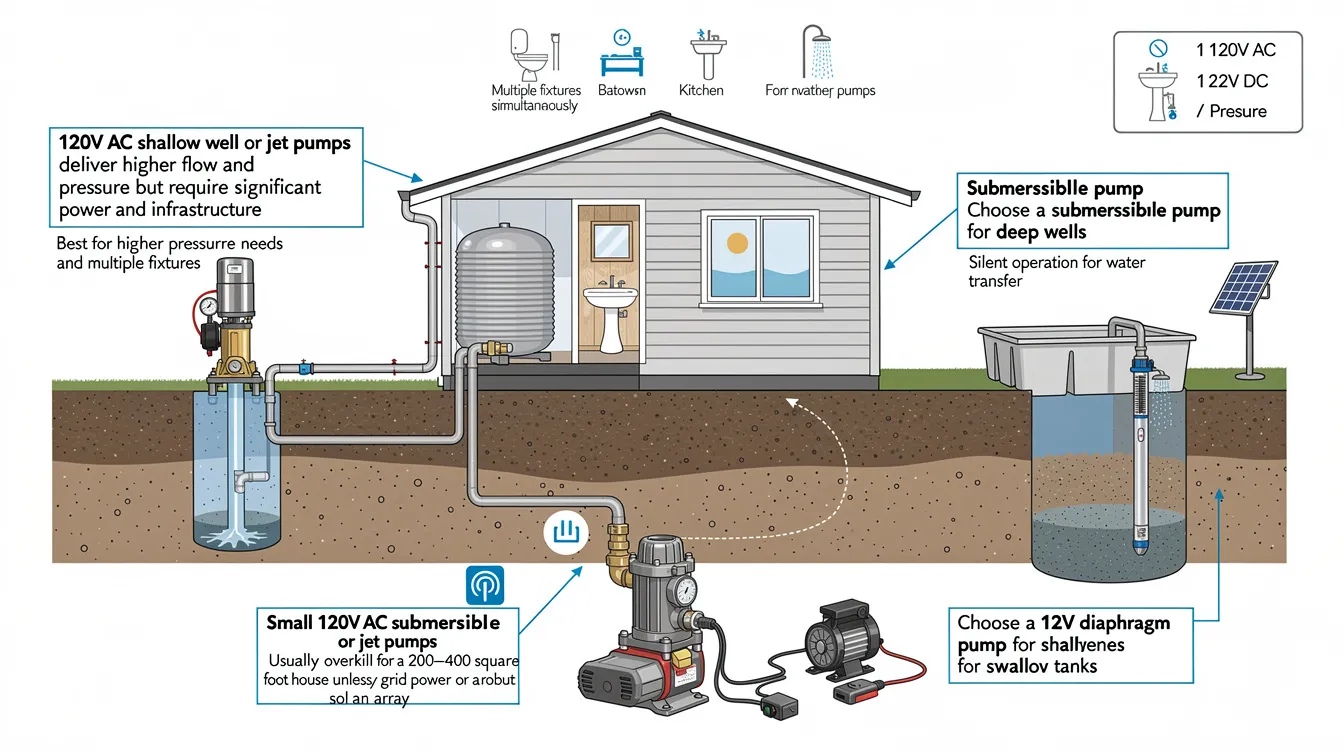
12V RV diaphragm pumps are the default for off grid tiny houses. They’re self-priming, operate on battery or solar power, and pair easily with an accumulator tank. Self-priming capability is important for pumps positioned above the water source. Most deliver 2.0 to 3.5 GPM at 40 to 55 psi. Look for pumps with dry run protection to prevent damage during tank-empty situations. 12v RV water pumps are suitable for off-grid applications and remain the most popular choice for mobile tiny homes.
120V AC shallow well or jet pumps deliver higher flow and pressure but require significant power and infrastructure. Jet pumps are best for higher pressure needs and multiple fixtures running simultaneously. Small 120V AC submersible or jet pumps are suitable for high-pressure needs, but they’re usually overkill for a 200 to 400 square foot house unless you have grid power or a robust solar array. Choose a submersible pump for deep wells and a 12V diaphragm pump for shallow tanks. Submersible pumps also provide silent operation for water transfer, which is a notable advantage.
Gravity-fed or manual options skip electricity entirely. Elevating a tank or IBC tote above fixture level provides 5 to 10 psi from gravity alone. That’s enough for a simple wash basin but too weak for a standard shower head.
Hydraulic ram pumps deserve mention for readers with flowing water on their property. Hydraulic ram pumps can lift water up to 180 feet and need at least 3 feet of head pressure to operate. A 1/2 inch ram pump can lift up to 300 gallons daily, a 1 inch ram pump requires 6 gallons per minute to operate, and a 1-1/4 inch ram pump can deliver up to 1400 gallons daily. They’re niche, but powerful when a creek is available.
In terms of comparison: RV diaphragm pumps cost $60 to $180, produce moderate noise, and install simply. A larger pump like a shallow well unit costs more and demands AC infrastructure. Gravity systems are cheapest and quietest but deliver the lowest flow.
Sizing your tiny house water pump (flow rate and pressure)
Oversizing a pump wastes power and money. Undersizing means weak showers and frustrating dish washing. Getting flow rate and pressure right matters.
Flow rate in practical terms: a low-flow shower head uses about 1.5 to 2.0 GPM (and low-flow shower heads help conserve water usage significantly), a kitchen faucet draws 1.0 to 1.5 GPM, and a compact washing machine may demand 2 to 3 GPM. Since most tiny houses run one fixture at a time, a 3.0 to 3.5 GPM pump handles nearly every situation.
Water pressure in the 30 to 50 psi range feels normal in a small house. Many RV pumps cycle between a cut-in of 20 to 30 psi and a cut-off of 40 to 60 psi. Constant pressure pumps adjust speed based on demand to save energy, though they cost more upfront.
Here’s a sizing example: a 280 square foot tiny house on wheels with one shower, one sink, and occasional washing machine use. A 3.0 to 3.5 GPM pump at 40 to 60 psi gives enough flow for a comfortable shower, handles the sink without lag, and powers the washer when the shower isn’t running. Going to a 6 GPM unit makes little sense unless you plan to run multiple fixtures simultaneously and have the power to spare.
Vertical lift and pipe length affect performance too. Even though runs are short in a tiny home, the elevation difference between tank and fixtures adds required head. Most diaphragm pumps specify a self-priming depth of 6 to 10 feet. Using half-inch PEX for main supply runs preserves flow; stepping down to 3/8 inch on long runs creates noticeable pressure loss.
The advice is simple: size the smallest pump that reliably meets your flow rate and pressure needs to reduce noise, costs, and off-grid power demand.
Water storage options for tiny houses
Water storage and pump must be planned together. Where you keep your fresh water determines how the pump gets installed and primed.
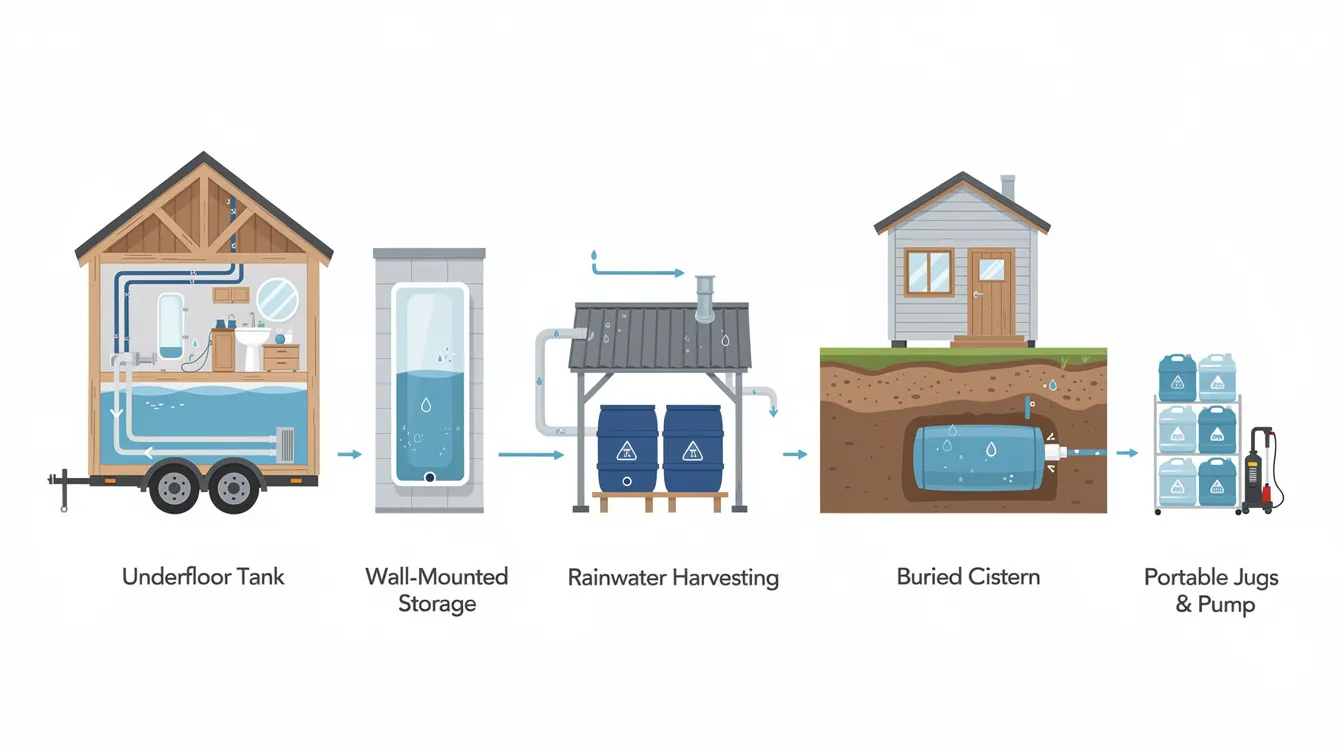
Indoor tanks-30 to 60 gallon flat or rectangular units placed under benches, beds, or a kitchen counter-are common for mobile tiny houses. They stay inside the insulated envelope, which helps protect against freezing. The downside: they consume interior space and add weight. Tiny houses often use a 46-gallon water tank for storage, which gives a single conservative user roughly 3 to 4 days between refills. Food-safe materials are necessary if the pump supplies drinking water, so always verify that tanks are rated for potable use.
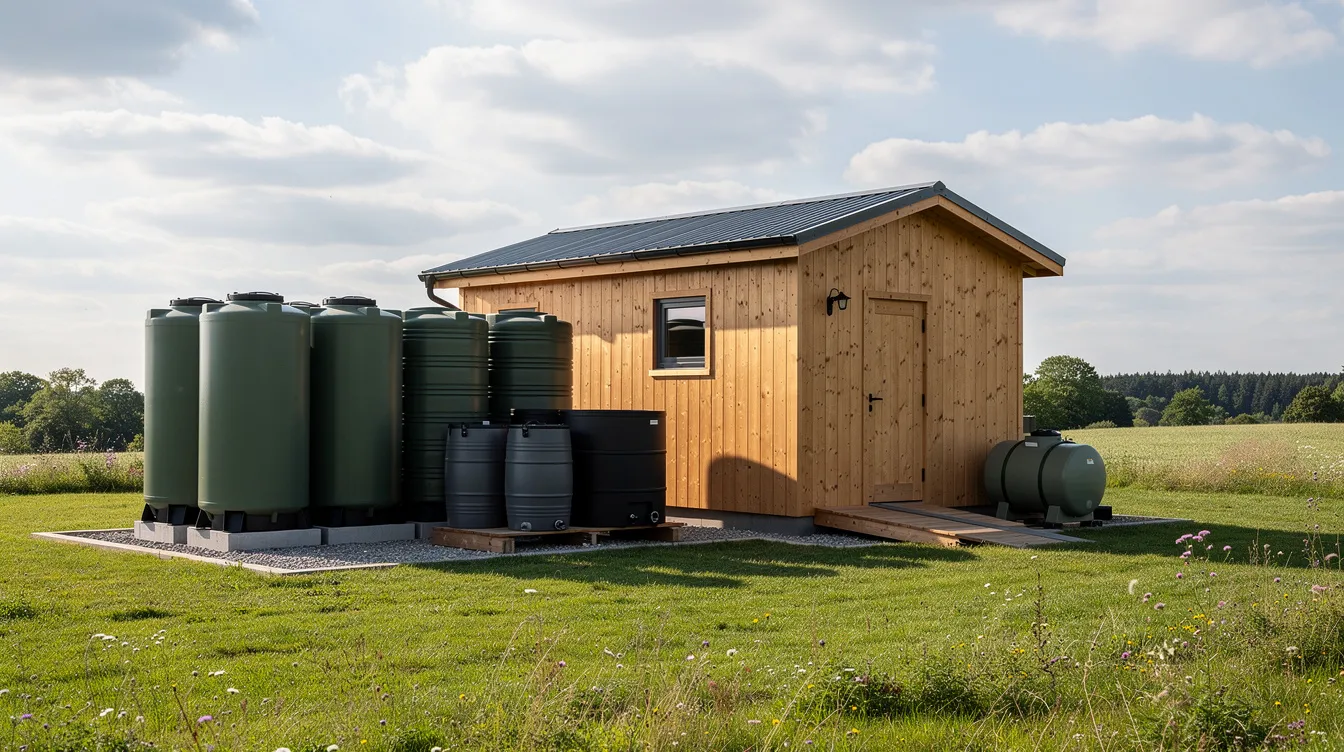
Outdoor storage scales up capacity. IBC totes (275 to 330 gallons) or poly cisterns (500 to 2,700 gallons) work well for stationary tiny houses on rural land. The tradeoff is freezing risk. Outdoor tanks need insulation, covers, or burial to protect them from cold. Use opaque containers to block light and prevent algae growth, and avoid chemicals that aren’t rated for potable systems.
Tank placement relative to the pump matters. If the tank sits below the pump, self-priming capability is essential. If the tank is above the pump, gravity keeps the inlet flooded, which makes priming effortless. Either way, an inlet strainer and check valves at the pump inlet prevent debris from entering and maintain prime.
Off-grid users who need more water often pair storage with a tiny house rainwater collection system or hauled-in water using a filter to ensure cleanliness before the water enters the tank.
Integrating a water heater with your pump (hot water in a tiny house)
The water heater and pump must be compatible in flow and pressure. A mismatch means lukewarm showers or a unit that refuses to ignite.
Tankless propane water heaters are the most common tiny house option. Compact wall-mounted units deliver 1.5 to 3.0 GPM depending on temperature rise, and they ignite using 12V power or batteries, making them some of the best water heaters for tiny houses. Many models require a minimum flow of about 0.5 to 0.8 GPM and at least 20 to 30 psi to fire. If your pump can’t deliver that pressure, the heater won’t turn on. If it delivers too much flow for the heater’s capacity, the water temperature drops.
Compact electric water heaters-small 4 to 20 gallon tank units or point-of-use heaters-make sense for grid-tied or high-solar systems. They consume significant electricity, so they need reliable power. Height constraints in lofted tiny houses can limit where you fit a tank unit.
A concrete pairing example: a 3.0 GPM 12V pump feeding a 2.0 GPM propane tankless heater. This combination lets you shower and then immediately wash dishes without waiting, though running both the bathroom shower and kitchen sink simultaneously may exceed the heater’s capacity and deliver cooler water.
Safety elements to address: install pressure relief valves on the hot side, ensure proper venting for gas units so combustion air flows correctly, and drain valves for leak management. Insulate hot water lines in cold climates to reduce heat loss and protect against freezing.
Pressurized water off grid: power, batteries, and solar
Off-grid pressurized water depends on matching your pump to your power system. If you rely on batteries and solar panels, pump water efficiently by choosing a unit that sips rather than gulps electricity.
A typical 12V RV diaphragm pump draws between 3 and 10 amps while running. Because it operates intermittently-only when a fixture is open-daily energy consumption stays surprisingly low. 12v RV pumps are effective for off-grid water systems, and 12V or 24V DC diaphragm demand pumps are ideal for off-grid setups. Select 12V/24V DC for off-grid systems and 120V AC for grid-connected systems.
Here’s a simple power budget: a 12V pump averaging 5 amps, running 30 minutes total per day, uses about 30 Wh (12V × 5A × 0.5h). A 100W solar panel producing 400 to 500 Wh daily covers that easily, and a 100 to 135 Ah battery bank stores more than enough reserve.
Contrast that with a 1 hp shallow well pump pulling 700 to 1,000 watts. Startup surges strain small inverters, and continuous draw drains batteries fast. That kind of power demand makes little sense for most tiny homes without robust grid connections.
Keeping wiring efficient matters. Run a dedicated 12V DC circuit for the pump with its own fuse and appropriately thick gauge wire to prevent voltage drop. Keep runs short. Using flexible hose on the pump inlet and outlet isolates vibration from the structure without losing flow.
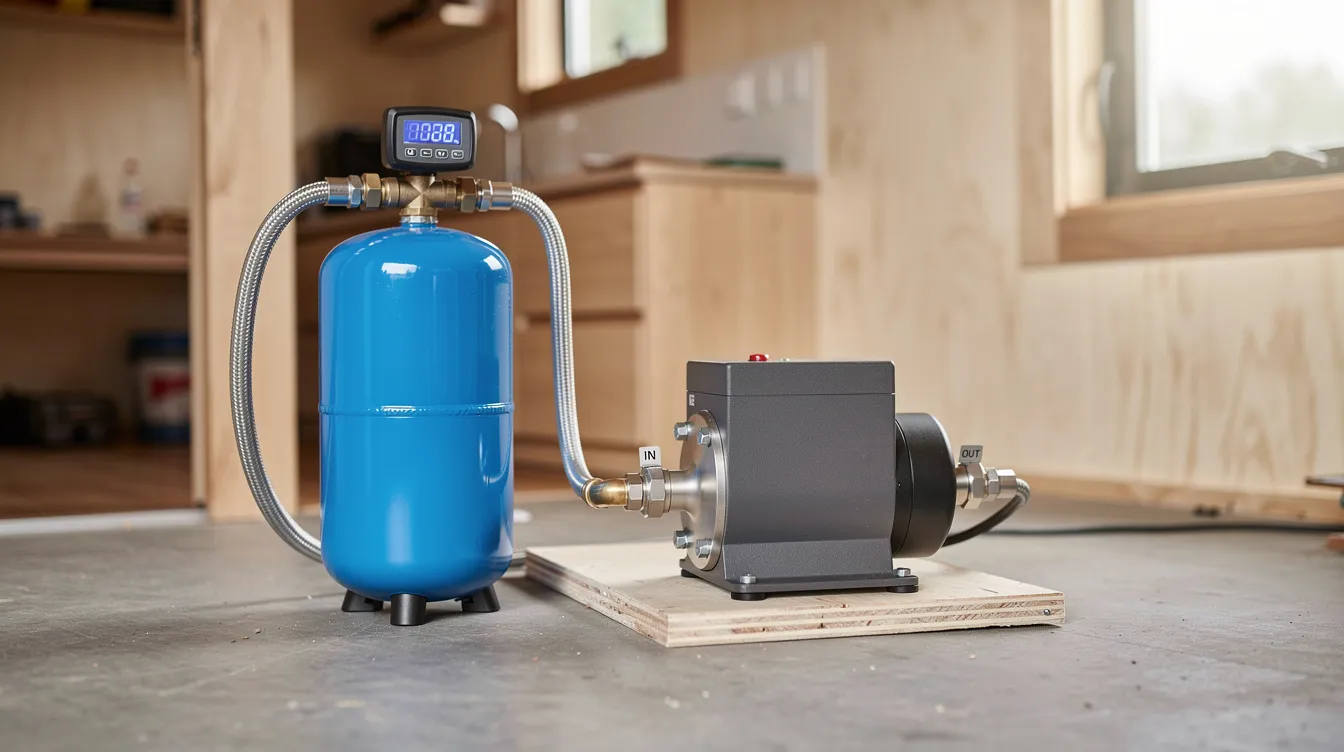
A pressure tank paired with your pump creates a buffer of pressurized air and water. The pump runs less frequently, smoothing electricity demand and reducing peak load on a small solar setup. This is one of the simplest upgrades that pays for itself in battery life and comfort.
Plumbing layout in a tiny house (piping, fixtures, and pump placement)
Pump location drives the whole process of laying out plumbing. The general flow path runs: tank → pump → accumulator → cold manifold → fixtures (cold) and → water heater → hot manifold → fixtures (hot).
Common pump locations include under the kitchen counter near the water storage tank, in a service bay beneath the floor, or in a small insulated pump house attached to an outdoor tank. The key is keeping the inlet hose short and the pump accessible for service, especially when you plan how to hook up a tiny house to utilities on a new site.
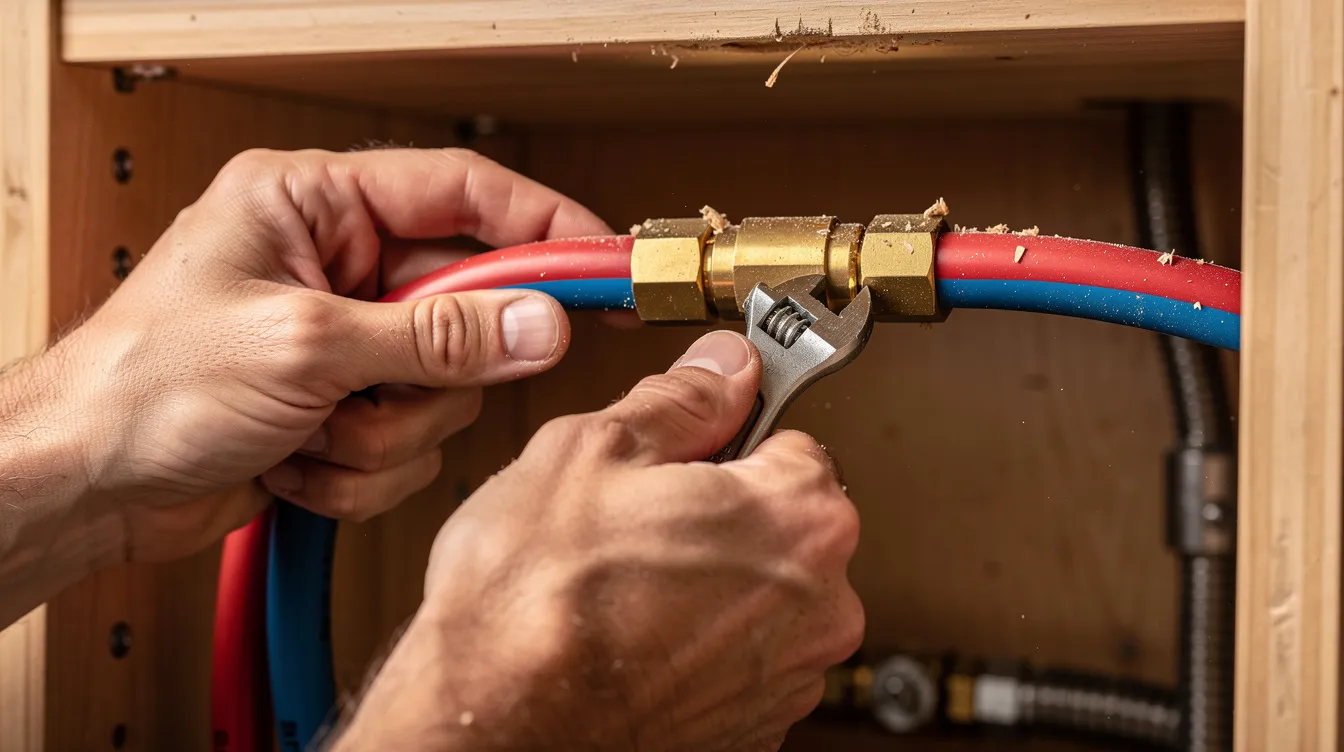
PEX piping is preferred for tiny house plumbing systems. It’s flexible, resists freezing better than rigid pipe, and doesn’t require special tools beyond a crimping kit. Use crimp or clamp fittings and brass connectors where durability matters. Some builders use pvc for drain lines while running PEX for supply-a sensible split that also simplifies routing to a tiny house grey water system. Avoid running supply lines through uninsulated cavities where they could freeze.
Group fixtures on one side of the house whenever possible. Placing the kitchen sink, shower, and small bathroom vanity on a shared wall shortens both hot and cold runs, reduces pressure losses, and cuts heat loss from hot lines.
Include ball valves and shutoff valves at the pump, near manifold tees, and at each fixture. Add drain points at the lowest spots so the system can be winterized or serviced without complications. Use unions or flexible couplings at the pump inlet and outlet to make removal straightforward.
Planning for future additions is easy: add capped tees at accessible locations near the manifold. If you eventually want to plumb an outdoor shower or washing machine connection, the rough-in is already in place.
Noise, vibration, and comfort: making your pump quiet
Quiet operation is essential due to limited space in tiny houses. Many owners have purchased a budget pump only to have it replaced within a year because the buzzing kept them up at night.
Rubber vibration mounts can reduce pump noise in tiny homes significantly. Mount the pump on rubber feet or a neoprene damping pad rather than screwing it directly to thin cabinetry. Use flexible hoses on both inlet and outlet so vibration doesn’t transmit through rigid pipe into the walls or floor.
An accumulator tank makes a dramatic difference. Accumulator tanks can help smooth water pressure and reduce rapid cycling of pumps. Instead of the pump kicking on for every two-second hand wash, the tank supplies stored pressurized water, and the pump only runs when the tank pressure drops below the cut-in point. Accumulator tanks provide pressurized water for longer periods, meaning fewer startups and quieter overall operation. Some sources estimate cycling reductions of around 70 percent.
Pump location matters too. Placing the unit in an insulated cabinet, under-floor compartment, or small utility closet away from sleeping areas reduces perceived noise. Even wrapping the pump compartment with acoustic foam helps.
One tiny house owner installed a basic 3.0 GPM 12V pump rigidly screwed to the underside of a bench seat. The vibration buzzed through the frame and into the sleeping loft. After remounting the same pump on rubber feet with flexible hose on both sides, the noise dropped to a brief hum only audible when the faucet first opened. The same pump worked fine-it just needed proper isolation.
Look for pumps labeled “ultra-quiet” or “RV/marine” that are marketed for noise-sensitive environments, even if the price is slightly higher.
Maintenance, winterizing, and reliability
Consistent, low-effort maintenance keeps a tiny house water pump reliable for years. Ignore it, and small problems become expensive ones.
Routine checks include:
- Cleaning or replacing the inlet strainer or filter every few months
- Inspecting fittings for small leaks, especially after travel
- Listening for unusual rapid cycle patterns that indicate a pressure leak or failing check valve
- Testing the pressure switch cut-in and cut-off settings annually
Winterizing is critical for tiny houses that move or sit in freezing climates. The whole process involves draining all supply lines from the lowest drain points, bypassing and draining the water heater, and running non-toxic RV antifreeze through the pump and lines. Protect external pipes and tanks with insulation, heat tape, or by storing them inside the insulated envelope as part of a broader tiny house waste management plan.
Keep the pump and any exposed piping above freezing. If the pump sits in an unheated bay, add a small thermostatically controlled heater or relocate it indoors. Air circulation around outdoor components helps prevent condensation and ice buildup.
Quality RV diaphragm pumps typically last 3 to 8 years. The pump will eventually need service or replacement, so keeping a spare diaphragm kit or a full replacement unit on hand makes sense for long-term off-grid living. Parts are readily available for popular brands.
Design the system so the pump is easy to reach: front-facing strainers, unions for quick disconnect, and clear labeling on all valves. You shouldn’t need to dismantle half the kitchen to swap a pump or clean a screen.
Example tiny house water pump setups (real-world scenarios)
These three scenarios show how different lifestyles create different pump and storage choices.
Example 1: 200 sq ft tiny house on wheels, mixed use. Two people, splitting time between RV parks and boondocking. Indoor 50-gallon tank under a bench. A 12V 3.0 GPM pump with a 2-gallon accumulator tank connected to a propane tankless heater delivering 2.0 to 2.5 GPM. PEX plumbing to kitchen sink, shower, and bathroom sink. An external garden hose hookup with regulator bypasses the pump when city water is available. Daily use: about 25 gallons. They fill the tank at campgrounds and operate on battery power when off grid.
Example 2: Stationary tiny house on rural land, fully off grid. A 500-gallon poly cistern buried outside, fed by rainwater catchment. A solar-powered 12V pump (4.0 GPM, a slightly larger pump for the bigger tank and longer run) with a 300W solar array, 200 Ah battery bank, and a 20-gallon pressure tank. Buried PEX runs to the house to protect from freezing. Propane tankless heater, off-grid sanitation systems for remote living, composting toilet. The owner installed the system over a weekend and hasn’t had to worry about water supply since.
Example 3: Ultra-minimalist cabin. A gravity-fed IBC tote on a raised platform, no electric pump. A small on-demand propane heater that can operate at low pressure handles the shower. Fixtures limited to a hand sink and compact shower. Daily use: about 10 to 15 gallons. No electricity required to pump water.
Adapt these patterns to your climate, mobility, and energy situation rather than copying any single example blindly.
Choosing and buying a tiny house water pump (checklist and next steps)
You now understand how pump, water storage, and heater fit together. Just as choosing the right tiny house trailer brand for your home on wheels provides a solid foundation, here’s how to make your final pump decision without wasting money on the wrong unit.
Decision checklist:
- On-grid, off grid, or hybrid?
- Estimated daily water use per person
- Preferred water heater type (propane tankless, electric tank, point-of-use)
- Available power (12V battery, inverter, solar capacity)
- Climate and freezing risk at your location
- Noise sensitivity in your living space
Key specs to look for on product pages:
Spec | What to check |
|---|---|
Flow rate | GPM at realistic load, not just open-flow rating |
Pressure | Shut-off PSI and cut-in/cut-off range |
Voltage | 12V DC, 24V DC, or 120V AC |
Self-priming | Maximum suction lift depth |
Dry run protection | Whether the pump can run dry safely |
Potable rated | Food-safe seals and housing materials for drinking water |
Noise | dB rating or user reviews on quiet operation |
Size the pump for expected simultaneous use-typically one fixture at a time in a tiny house. A smaller pump that matches your actual demand will be quieter, cheaper to operate, and more reliable than an oversized unit. Choosing quality over maximum power keeps the system simple. |
Pair the pump with a correctly sized accumulator tank, a good strainer, and proper fittings from day one. Doing this research upfront avoids common frustrations like short cycling, leaks, and premature pump failure.
Your next steps: sketch your system layout on paper-tank, pump, heater, manifold, fixture locations. Create a parts list with pricing. If you’re not confident in your plumbing skills, consult a tiny house plumber familiar with off-grid setups. The whole process from planning to flowing water can happen in a single weekend if you’ve done the homework.