
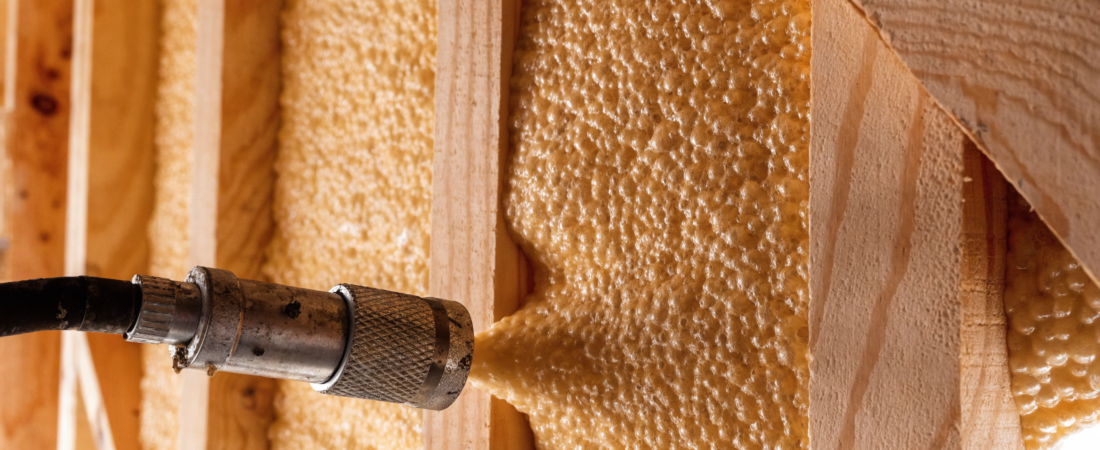

TL;DR: Closed cell spray foam is the top insulation pick for tiny houses because it delivers R-6 to R-7 per inch, seals every air gap, and doubles as a moisture barrier. For tiny homes with 2×4 walls, two inches of closed cell foam hits R-12 to R-14 — enough to meet code in most climates without sacrificing precious wall space.
If you’re building or insulating a closed cell spray foam tiny house, you’ve probably heard this material mentioned more than almost anything else when it comes to insulation choices. That’s not an accident. Tiny houses have tight wall cavities, often just 3.5 inches deep. Most insulation types simply can’t deliver a strong enough R-value in that small space. Closed cell spray foam can. It packs R-6 to R-7 per inch, seals every air gap, and acts as its own moisture barrier — all in one pass. This guide breaks down what it costs, where to use it, and whether you should hire a pro or buy a DIY spray foam kit.
What Is Closed Cell Spray Foam?
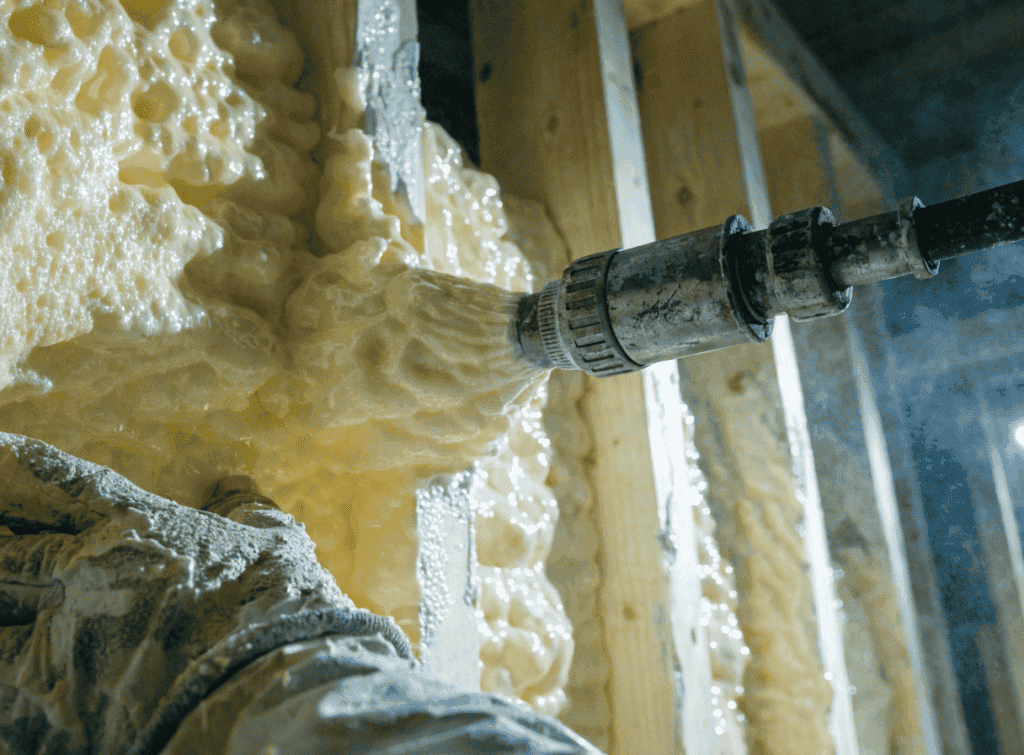
Closed cell spray foam is a two-part chemical insulation. When the two components — polyol resin and isocyanate — mix at the spray tip, they react fast and expand into a rigid, dense foam. That foam cures hard within seconds.
The “closed cell” part matters. Each tiny bubble in the foam is fully enclosed, packed tightly together. That structure gives it:
- High density: 1.5 to 2.0 lb per cubic foot
- Rigidity: It dries hard, not soft or spongy
- Moisture resistance: Water vapor can’t pass through it
Compare that to open cell foam, which has a sponge-like structure with interconnected bubbles. Open cell foam is lighter, cheaper, and softer — but it absorbs moisture and delivers far less R-value per inch.
Closed cell spray foam is used in walls, roofs, floors, crawlspaces, and anywhere air or moisture leaks are a problem.
Why Closed Cell Spray Foam Is a Good Fit for a Tiny House
Tiny houses don’t have the luxury of thick walls. Most tiny home builders frame with 2×4 lumber, which gives you a 3.5-inch wall cavity. That’s it. Every inch matters.
Here’s why closed cell foam works so well in that setup:
Maximum R-Value Per Inch
Closed cell spray foam delivers R-6 to R-7 per inch, according to the U.S. Department of Energy. At two inches thick in a 2×4 wall, that’s R-12 to R-14. At three inches, you’re hitting R-18 to R-21 — well above the R-15 wall requirement for temperate climates.
Fiberglass batts max out at around R-3.5 per inch. To hit R-15 with fiberglass, you’d need over four inches of wall space. Closed cell foam gets you there in half the space, and that higher insulation density helps create a more energy efficient tiny home without giving up valuable wall cavity.
Built-In Vapor Barrier
Closed cell foam is a Class II vapor retarder. You don’t need to install a separate plastic vapor barrier — the foam handles it. For tiny houses on wheels that move through different climates, this matters a lot.
Air Sealing in One Step
A spray foam application seals every gap, seam, and crack as it expands. That means fewer air leaks, less condensation risk, and a tighter building envelope — all from one product.
Added Structural Strength
When applied to wall framing, closed cell foam bonds to the studs and sheathing. This adds measurable rigidity to the structure, which is especially useful for a tiny house on wheels that vibrates during transport.
Closed Cell vs Open Cell Spray Foam for Tiny Houses
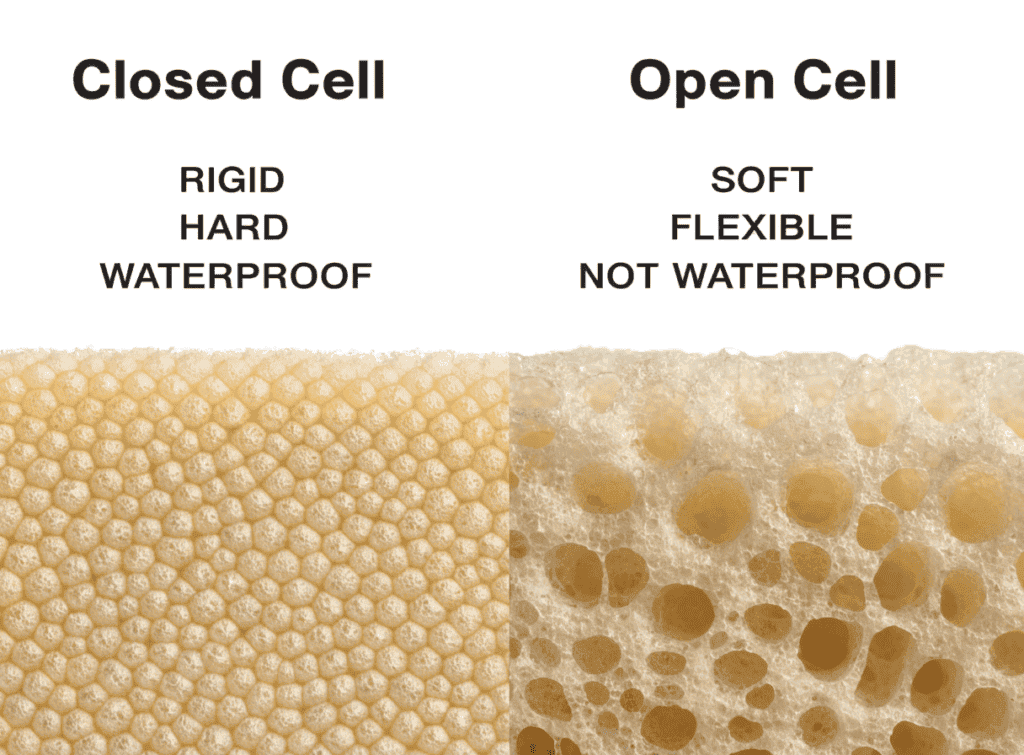
Both types expand when sprayed, but they perform very differently. Here’s a quick side-by-side:
Feature | Closed Cell | Open Cell |
|---|---|---|
R-value per inch | R-6 to R-7 | R-3.5 to R-3.8 |
Cost per board foot | $1.15 to $2.00 | $0.44 to $0.80 |
Yes (Class II) | No | |
Density | 1.5 to 2.0 lb/ft³ | 0.5 lb/ft³ |
Moisture resistant | Yes | No |
Structural support | Yes | No |
Best for | Walls, floors, roof, exteriors | Interior walls, sound dampening |
The verdict for tiny houses: Open cell foam is cheaper upfront, but it won’t give you the R-value you need in a 3.5-inch wall cavity. Builders also weigh other options depending on space, moisture, and budget. It also absorbs moisture, which is a real risk in a small structure with limited air circulation. Closed cell foam costs more, but it does three jobs at once — insulating, air sealing, and moisture blocking. |
Choose open cell only if you’re insulating interior partition walls for sound dampening or if budget is the main driver and you can make up R-value with other methods.
R-Value Breakdown for Tiny House Insulation
Every part of a tiny house loses heat differently, and each area needs a different R-value target. For a broader look at materials, techniques, and costs, this tiny house insulation guide explains how to match insulation types and R-values to your specific build. For temperate climates, the general targets are:
- Walls: R-13 to R-15
- Roof/ceiling: R-30
- Floor: R-13 to R-19
In colder climates, those numbers go up, and overall design needs to account for deeper cold, air sealing, and efficient heating in a compact space, especially if you’re planning a winter-ready tiny home for colder climates. The floor deserves extra attention in a tiny house on wheels — cold air moves freely under the trailer, and thermal bridging through the steel frame pulls heat out fast.
Want a deeper look at how R-values work and what your specific climate zone requires? This guide on tiny house insulation R-value breaks it down clearly.
Here’s how closed cell foam thickness lines up against those targets:
Thickness | R-Value | Best Application |
|---|---|---|
1 inch | R-6 to R-7 | Rim joists, gap sealing |
2 inches | R-12 to R-14 | Walls (temperate climate) |
3 inches | R-18 to R-21 | Walls (cold climate), roof deck |
4 to 5 inches | R-24 to R-35 | Roof (meets R-30 target) |
How Much Does Closed Cell Spray Foam Tiny House Insulation Cost?
Cost depends on how much area you’re covering and how thick you apply the foam. According to Proseal Spray Foam, closed cell spray foam costs $1.15 to $2.00 per board foot installed, or roughly $1.25 to $4.50 per square foot depending on thickness.
For a tiny house on wheels (typically 150 to 400 square feet of interior surface area across walls, roof, and floor), a professional spray foam job typically runs, and this becomes one piece of your overall tiny house cost breakdown:
- Small application (just walls or just floor): $600 to $1,500
- Full spray foam job (walls, roof, and floor): $1,500 to $4,000+
These figures are lower than a full-size home because the surface area is smaller. New construction is also cheaper to spray than retrofitting a finished tiny house, since the framing is open and accessible.
What drives cost up:
- Colder climate zones requiring greater thickness
- Tight or awkward spaces (wheel wells, curved roofs)
- Retrofit work requiring removal of existing materials
- Regional labor rates
What drives cost down:
- DIY kits for smaller areas
- New construction with exposed framing
- Partial applications (floor only or walls only)
The EPA’s ENERGY STAR program estimates that homeowners save an average of 15% on heating and cooling costs with proper air sealing and insulation. On a tiny home with low energy bills to start, that payback timeline is short.
Best Places to Use Closed Cell Spray Foam in a Tiny House
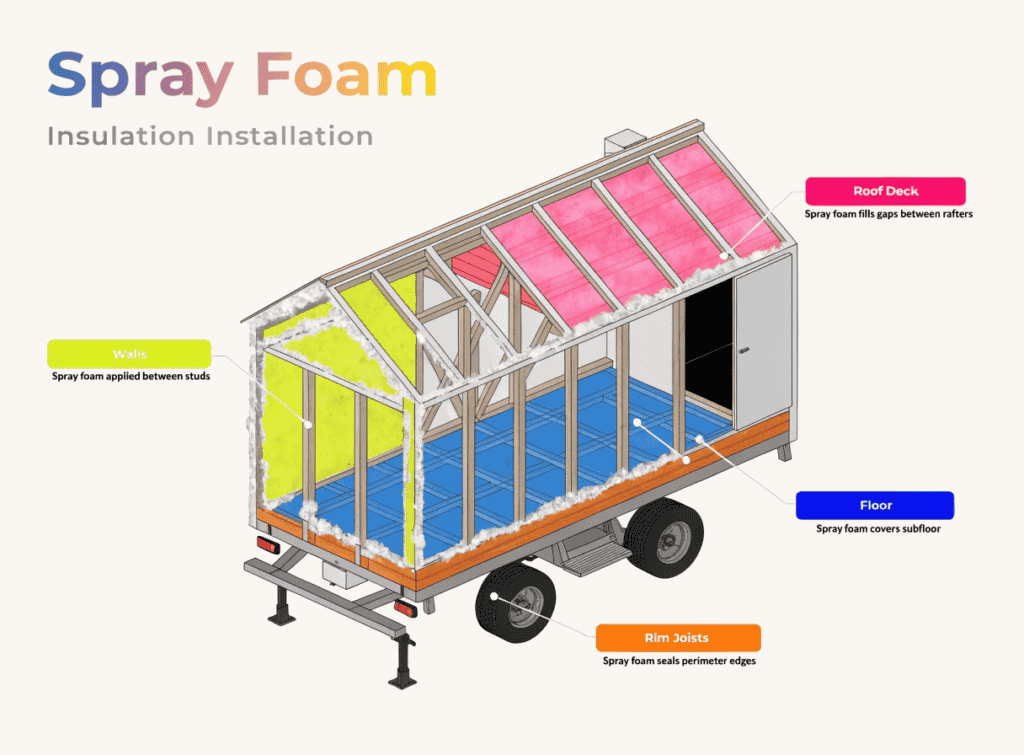
Not every part of a tiny home needs closed cell foam. Here’s where it earns its cost:
Walls
The 3.5-inch stud cavity is where closed cell foam shines. Two inches of foam fills more than half the cavity and hits R-13 to R-14. You can stop there or add exterior rigid foam panels for extra R-value and less thermal bridging without touching the interior space. In a finished wall, the foam sits in the cavity before the drywall goes up.
Roof and Ceiling
Heat rises. This matters even more in an attic-style loft or roof cavity, where heat buildup is hardest to control. Your roof is the biggest area of heat loss. Closed cell foam applied directly to the roof deck (spray from inside, between rafters) creates an unvented roof assembly that performs well in tight loft spaces. Reflective insulation is mainly useful in hot climates because it reflects radiant heat instead of resisting heat flow the way foam does. Target 4 to 5 inches for R-24 to R-35.
Floor and Trailer Frame
This is one of the most important areas in a tiny house on wheels. Road airflow and wind under the trailer increase heat loss if the underside is not sealed well. Cold air moves under the trailer constantly, and the steel frame creates thermal bridges. Closed cell foam sprayed on the underside of the floor deck — including around wheel wells and along the trailer frame — blocks both air movement and moisture from road exposure.
Rim Joists and Band Joists
These are small but leaky areas where the floor framing meets the wall framing. One to two inches of closed cell foam here seals a common weak point.
Under Sinks and Around Plumbing Penetrations
Any pipe or wire that passes through the wall or floor is a potential air leak. A quick spray of closed cell foam around each penetration seals it permanently.
DIY vs Professional Installation
This is a real decision for tiny house builders, many of whom prefer to do their own work and carefully track expenses with tools like a tiny house budget cost calculator.
DIY Spray Foam Kits
Pros:
- Lower upfront cost ($150 to $800 per kit depending on size)
- Works well for small areas: wheel wells, rim joists, penetrations
- No contractor scheduling required
- Good for spot fixes after move-in
Cons:
- Kits have limited coverage (typically 15 to 600 board feet)
- Improper mixing temperature causes poor foam quality
- Off-ratio mixing produces weak or tacky foam
- Requires full PPE: face mask, respirator, gloves, goggles, disposable clothing
- Difficult to apply consistently over large areas
When DIY makes sense: Sealing specific spots — around pipes, in wheel wells, or along rim joists. For targeted areas under 100 square feet, a kit from brands like Tiger Foam or Touch ‘n Foam is a solid pick.
Professional Installation
Pros:
- Commercial-grade equipment applies foam at the right ratio and temperature
- Even coverage and consistent cell structure
- Faster — a full tiny house can be sprayed in a few hours
- Contractor carries liability for the work
Cons:
- Higher cost than DIY kits
- Must coordinate scheduling
- You need to vacate the space during spraying and for 24 hours after
When professional makes sense: Full wall, roof, and floor applications. Any job where consistent R-value across the entire building envelope is needed. If you’re living in the tiny house full-time, professional installation gives you the most reliable performance.
Tips for Buying Closed Cell Spray Foam Kits
If you’re going the DIY route for smaller areas, keep these points in mind before ordering, and factor them into any tiny home cost calculator estimates you’re using to plan your build:
- Buy by board feet, not by kit size. A “600 board foot kit” covers 600 square feet at one inch thick — or 200 square feet at three inches thick. Do the math for your specific application before ordering.
- Store chemicals at the right temperature. Both components need to be between 70°F and 90°F before spraying. Cold chemicals = weak foam. Let your kit warm up indoors for 24 hours before use.
- Use all PPE. Closed cell foam chemicals are serious skin and respiratory irritants before they cure. A half-face respirator with organic vapor cartridges, gloves, goggles, and disposable coveralls are non-negotiable.
- Mask everything nearby. Overspray is nearly impossible to remove from surfaces once cured. Tape plastic sheeting over windows, doors, wiring, and anything you don’t want foam on.
- Apply in thin passes. Multiple thin lifts cure better than one thick pour. Each layer should be no more than two inches thick to avoid heat build-up during the exothermic cure reaction.
- Check the shelf life. Most two-component kits have a shelf life of 12 to 18 months. Expired chemicals may not foam correctly.
The Smartest Insulation Decision You’ll Make for Your Tiny Home
Insulation is one of the few building decisions that helps create a comfortable tiny home by affecting your comfort, energy bill, and moisture control all at once. Get it right and your tiny home stays comfortable year-round with low heating and cooling costs. Get it wrong and you’re dealing with cold floors, condensation problems, and high utility bills in a very small space.
Closed cell spray foam solves most of those problems in one product. The upfront cost is higher than fiberglass or open cell foam, but the performance in a tiny wall cavity is hard to match. It’s highly effective, though builders who prioritize eco friendly materials may still compare it with greener alternatives before deciding. For walls, floors, and roof deck applications in a tiny house on wheels, it consistently outperforms every alternative on R-value per inch, moisture control, and air sealing.
Use a professional installer for full-envelope jobs. Grab a DIY kit for spot sealing. And take your time planning the thickness for each area — because the right R-value in the right places is what makes a closed cell spray foam tiny house worth every penny.
Frequently Asked Questions
What is the best insulation for a tiny house on wheels?
Closed cell spray foam is the top-rated insulation for tiny houses on wheels. It delivers R-6 to R-7 per inch — the highest R-value per inch of any common insulation — while also acting as a vapor barrier and air sealant. This combination is hard to match in the tight wall cavities typical of tiny home framing. Builders who want eco friendly insulation sometimes compare it with denim or cellulose, but those options need more wall thickness to reach the same R-value.
How thick should closed cell spray foam be in tiny house walls?
For most temperate climates, two inches of closed cell spray foam in a 2×4 wall cavity delivers R-12 to R-14, which meets the standard R-13 to R-15 wall requirement. In colder climates, three inches gives you R-18 to R-21, which exceeds most code minimums.
Can I use a DIY spray foam kit to insulate a tiny house?
Yes, but only for targeted areas. DIY closed cell foam kits work well for rim joists, wheel wells, pipe penetrations, and small gaps. For full walls, roof, and floor coverage, professional installation delivers more consistent results because commercial equipment controls the mixing ratio and temperature precisely.
How much does it cost to spray foam a tiny house?
A professional closed cell spray foam job for a full tiny house (walls, roof, and floor) typically costs between $1,500 and $4,000, depending on the size of the home, wall thickness needed, and regional labor rates. Partial applications for specific areas like the floor only or walls only run $600 to $1,500.
Does closed cell spray foam act as a vapor barrier in a tiny house?
Yes. Closed cell spray foam is classified as a Class II vapor retarder. At two or more inches of thickness, it controls moisture movement effectively and eliminates the need for a separate plastic vapor barrier in most applications.
How long does spray foam insulation last in a tiny house?
Properly installed closed cell spray foam does not settle, sag, or degrade. Unlike some rigid foam products, it does not rely on gas-filled board performance that can drop over time from off gassing. It bonds permanently to framing materials and can last the lifetime of the structure — often 50 to 80 years or more. This makes it a long-term investment that doesn’t need to be replaced as the home ages.