
TL;DR: Tiny house insulation cost ranges from $0.25 to $4.50 per square foot depending on the material. Fiberglass batts are the most affordable option, while closed-cell spray foam costs more upfront but saves the most energy long-term. Total insulation costs for a typical tiny home typically fall between $500 and $3,500.
Tiny house insulation cost is one of the first things people ask about when planning a build — and for good reason. Insulation affects your comfort, your energy bills, and how well your tiny home holds up across seasons. Get it right, and your home stays warm in winter and cool in summer without running your heating or cooling system overtime. Get it wrong, and you’ll feel every cold draft. This guide breaks down what different insulation types cost, what drives prices up or down, and how to spend your money wisely — whether you’re going DIY or calling in a pro.
- What Is Tiny House Insulation Cost?
- Types of Insulation for Tiny Houses (With Costs Per Type)
- Factors That Affect Tiny House Insulation Cost
- DIY vs. Hiring a Pro: Cost Breakdown
- How to Save Money on Tiny House Insulation
- Best Insulation Materials for Tiny Homes
- Tips for Insulating Walls, Floors, and Roof
- The Bottom Line on Tiny Home Insulation
- Frequently Asked Questions
- How much does it cost to insulate a tiny house on average?
- What is the cheapest insulation for a tiny house?
- Can I insulate a tiny house myself?
- What R-value do I need for a tiny house?
- Is spray foam insulation worth the cost for a tiny house?
- How does a tiny house on wheels change insulation costs?
- What is the most eco-friendly insulation for a tiny house?
What Is Tiny House Insulation Cost?
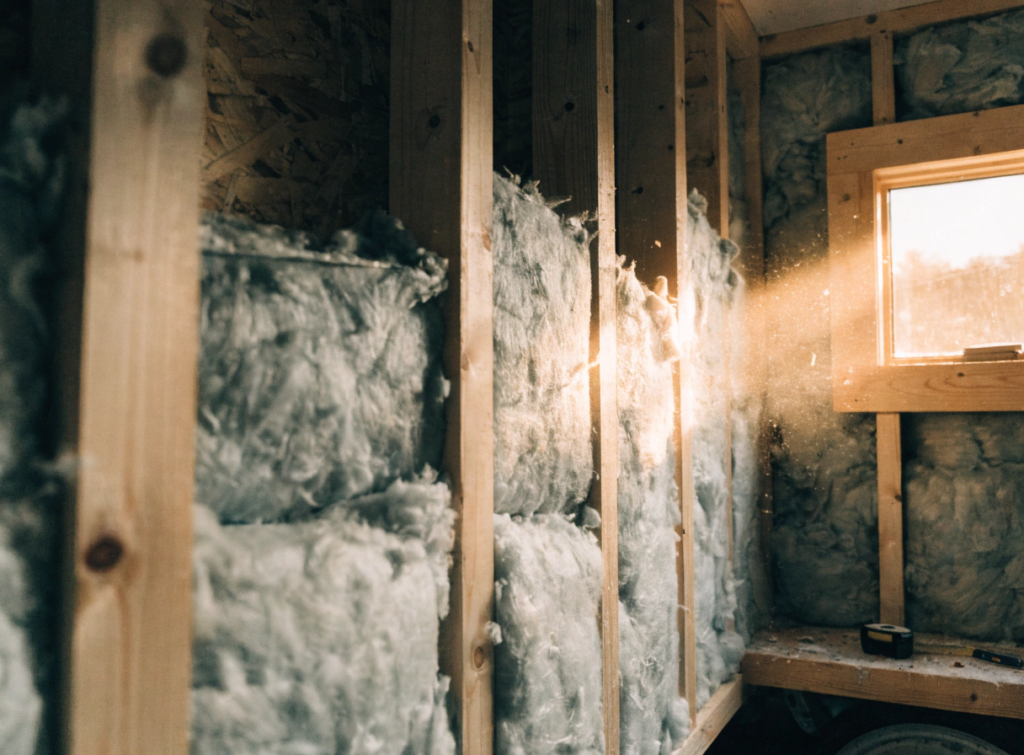
At a basic level, tiny house insulation cost covers the price of materials — and sometimes labor — to create a thermal barrier inside your walls, floor, and roof.
Material prices vary widely. Budget-friendly options like rigid foam boards start at around $0.25 per square foot, while premium closed-cell spray foam can run $1.00 per board foot or more for the material alone. When you add labor, total installed costs climb higher.
For a full tiny home insulation project, most builds fall somewhere between $500 and $3,500 total, depending on the size of the home, the materials chosen, and whether you hire a contractor or do it yourself. Upgrading from basic insulation to a high-performance option typically adds about $2,000 to your total construction cost, according to OneClickDIY — though the energy savings often make that worth it.
Here’s a quick snapshot of installed costs by material, based on national averages from HomeGuide:
| Insulation Type | Cost Per Sq Ft (Installed) |
|---|---|
| Closed-cell spray foam | $0.90 – $1.00 / board ft |
| Open-cell spray foam | $0.30 – $0.50 / board ft |
| Rigid foam boards | $0.25 – $0.75 |
| Fiberglass batts | $0.30 – $1.30 |
| Mineral/rock wool | $1.00 – $2.50 |
| Sheep’s wool | $1.00 – $3.00 |
| Denim/cotton batts | $1.00 – $2.00 |
Types of Insulation for Tiny Houses (With Costs Per Type)
Different materials work better for different budgets, climates, and building styles. Here’s a plain-talk breakdown of your main choices:
Closed-Cell Spray Foam
This is the top performer. Closed-cell spray foam delivers an R-value of R-5.6 to R-8 per inch, which is the highest of any common insulation type. It also blocks moisture and air infiltration — two big concerns in tiny homes. The catch? It costs more and requires professional installation. Expect to pay $0.90 to $1.00 per board foot for materials alone.
Open-Cell Spray Foam
A more affordable spray foam option. Open-cell offers R-3.5 to R-3.7 per inch and costs around $0.30 to $0.50 per board foot. It’s lighter and more flexible, but it absorbs moisture, so it’s not ideal for climates with heavy humidity or rain.
Fiberglass Batts
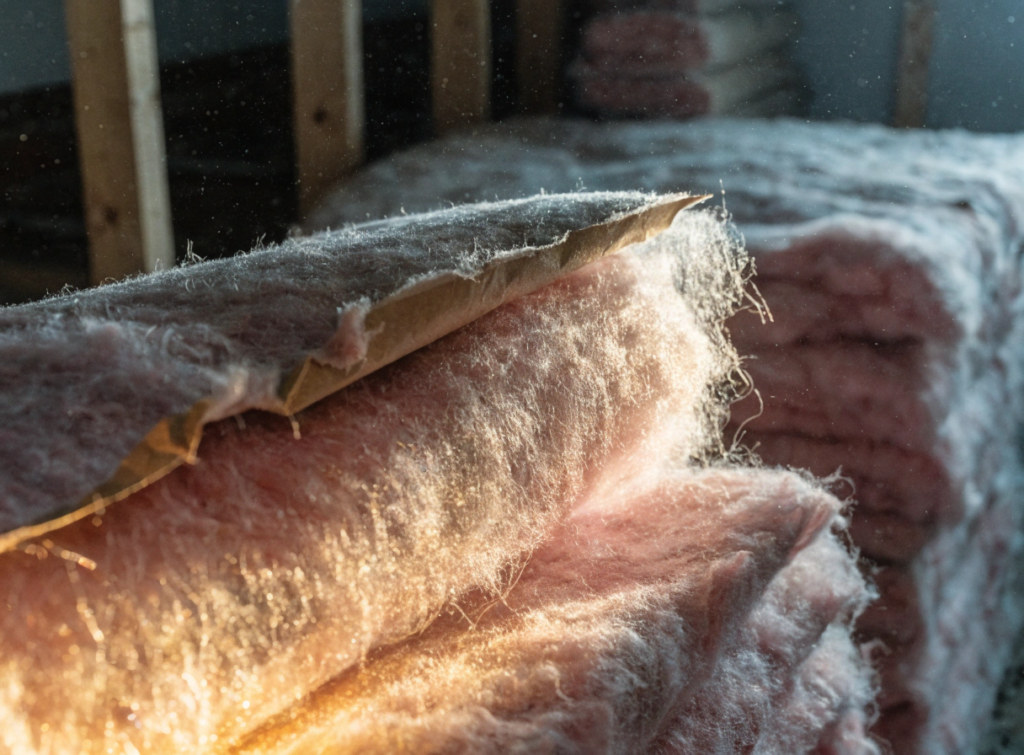
The classic budget pick. Fiberglass batts run $0.30 to $1.30 per square foot installed and provide R-2.9 to R-3.8 per inch of thermal protection. They’re easy to cut and fit into standard wall cavities, making them popular for DIY builders. The downside is that gaps and compression reduce their effectiveness over time.
Rigid Foam Boards
Great for floors and exteriors. Rigid foam boards offer R-3.8 to R-6.5 per inch depending on the type (XPS, EPS, or Polyiso), and cost $0.25 to $0.75 per square foot. They’re lightweight, moisture-resistant, and easy to cut with basic tools.
Mineral Wool (Rockwool)
A solid mid-range option. Mineral wool delivers R-3.2 to R-4.1 per inch and costs $1.00 to $2.50 per square foot. It holds its shape over time, adds sound insulation, and resists fire — all big wins for tiny home builders.
Sheep’s Wool
A natural, eco-friendly pick for those who want to minimize synthetic materials. Sheep’s wool gives you around R-3.8 per inch and costs $1.00 to $3.00 per square foot. It manages moisture well but can be harder to source and may cost more than conventional options.
Denim/Cotton Batts
Made from recycled denim, these batts offer around R-3.5 per inch and cost $1.00 to $2.00 per square foot. They’re safe to handle without protective gear and appeal to eco-conscious builders, but they can absorb moisture if not carefully protected.
Factors That Affect Tiny House Insulation Cost
Tiny house insulation cost doesn’t follow a single formula. A number of things push prices up or down:
1. Material Choice
As covered above, your material selection is the biggest cost driver. Fiberglass and rigid foam boards are the most affordable. Spray foam and wool are the most expensive.
2. Total Square Footage
Tiny homes typically range from 100 to 400 square feet, but every build is different. More surface area to cover means higher material quantities and higher costs.
3. Climate Zone
Where you live determines how much insulation you need. The U.S. Department of Energy divides the country into 8 climate zones with specific R-value targets. A tiny home in Minnesota (Zone 7) needs far more insulation than one in Florida (Zone 2). More insulation depth = more material = higher cost.
You can check the recommended R-values by climate zone to find out exactly what your home needs for walls, floors, and the roof.
4. Roof, Wall, and Floor Design
Steeper roofs, metal framing, and complex layouts add installation time and can require more material to cover gaps and thermal bridges properly.
5. Trailer vs. Foundation
Tiny houses on wheels (THOW) face extra challenges. Metal trailer frames create thermal bridges — spots where heat escapes through the frame itself. Addressing thermal bridging properly adds cost but is essential for comfort and efficiency.
6. Labor Costs
If you hire a professional, labor typically adds $1 to $3 per square foot on top of material costs. Some specialty jobs like spray foam application can cost more.
DIY vs. Hiring a Pro: Cost Breakdown
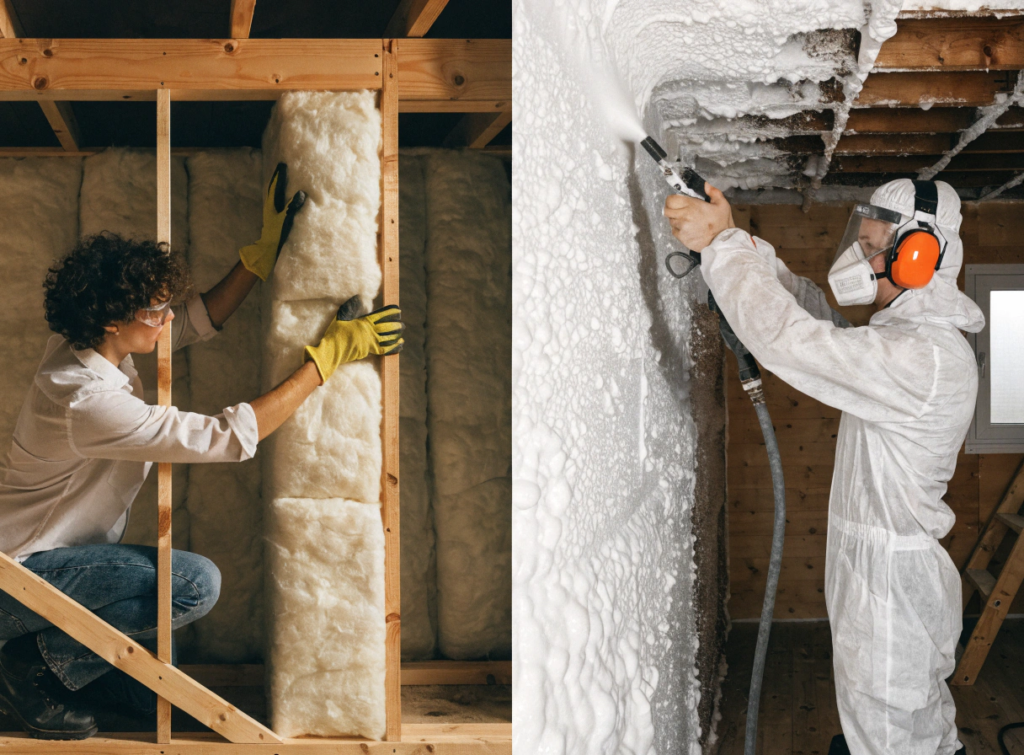
One of the biggest decisions you’ll make is whether to insulate your tiny home yourself or bring in a contractor. Both have real advantages.
DIY Insulation
Going the DIY route can save a significant chunk of money on labor. These materials work well for self-installation:
- Fiberglass batts — easy to cut and fit into wall cavities
- Rigid foam boards — cut with a utility knife, no special tools needed
- Mineral wool — holds its shape and installs cleanly
- Sheep’s wool and denim batts — no protective gear required for handling
The trade-off is time and precision. Gaps, compression, and missed spots reduce performance and can lead to moisture problems down the road.
Professional Installation
Some materials simply require a pro. Closed-cell and open-cell spray foam need specialized equipment and trained hands to apply correctly. Improper foam application can cause air pockets, uneven coverage, and even structural issues.
Hiring a contractor also makes sense if:
- Your build is complex (curved roofs, metal framing, unusual cavities)
- You’re in a cold climate and need maximum performance
- You’re not confident about achieving the right R-values consistently
A pro costs more upfront, but quality installation protects your investment long-term.
How to Save Money on Tiny House Insulation
Cutting costs doesn’t mean cutting corners. Here are practical ways to keep your tiny house insulation budget under control:
- Air seal before you insulate. Sealing gaps around windows, doors, electrical outlets, and wall joints with caulk or expanding foam costs very little and dramatically improves insulation performance. This step is often more impactful than upgrading to a pricier material.
- Go DIY where you can. Use fiberglass batts or rigid foam boards for areas you can handle yourself. Save the spray foam budget for hard-to-reach spots or critical air-sealing areas.
- Prioritize the roof. Heat rises, so your roof (or ceiling) is where energy loss happens fastest. Spending more on roof insulation gives you the biggest return.
- Buy materials in bulk. Purchasing batts or boards by the full pack or pallet is almost always cheaper per unit than buying individual pieces.
- Match your R-value to your climate. Over-insulating can waste money just as under-insulating can. Know your climate zone requirements (check here) and stick to those targets.
- Choose materials with a long lifespan. Closed-cell spray foam and mineral wool rarely need replacement. Choosing durable materials upfront means less spending over time.
Best Insulation Materials for Tiny Homes
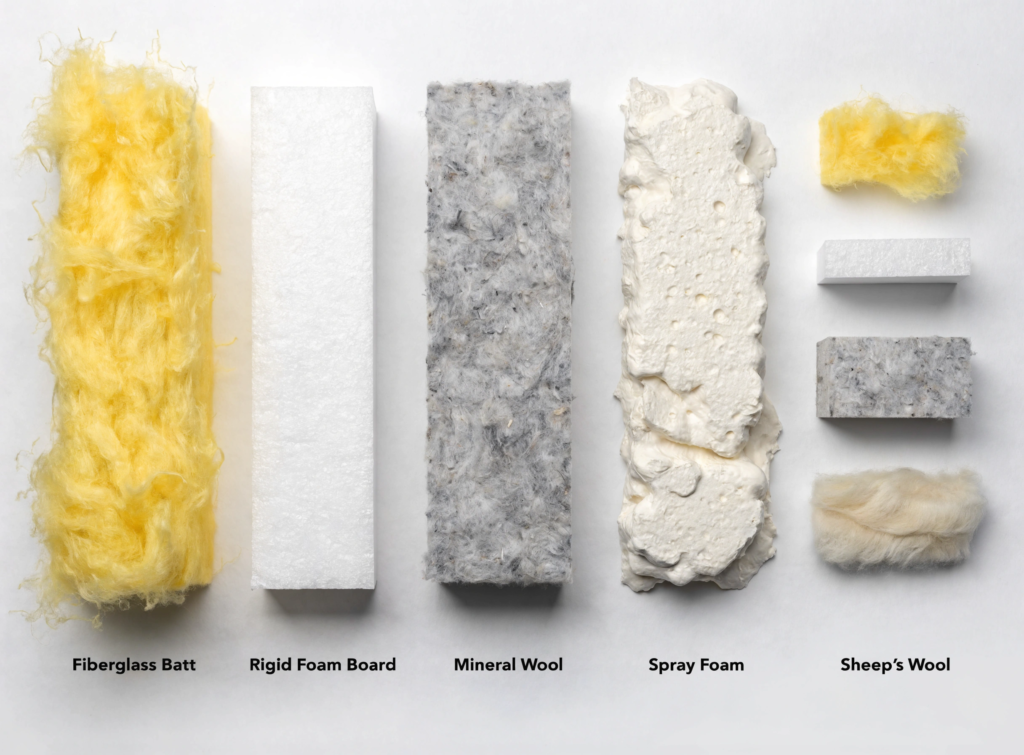
Not sure where to start? Here’s a quick guide based on your priorities:
- Best overall performance: Closed-cell spray foam. Highest R-value, moisture control, and structural support in one product.
- Best budget option: Fiberglass batts. Low cost, easy to install, widely available at any home improvement store.
- Best for floors: Rigid foam boards. Lightweight, moisture-resistant, and easy to fit between floor joists.
- Best for sound control: Mineral wool. Dense fibers block noise effectively — great if you plan to park your tiny home near busy roads or in urban spots.
- Best eco-friendly option: Sheep’s wool or denim/cotton batts. Both are made from natural or recycled materials and are safe to handle without protective equipment.
- Best for harsh or changing climates: Closed-cell spray foam. It functions as both insulation and a vapor barrier, making it reliable across climate zones.
For tiny homes on wheels, weight matters. Lighter options like spray foam and rigid foam boards reduce the load on your trailer and can improve fuel efficiency when towing.
Tips for Insulating Walls, Floors, and Roof
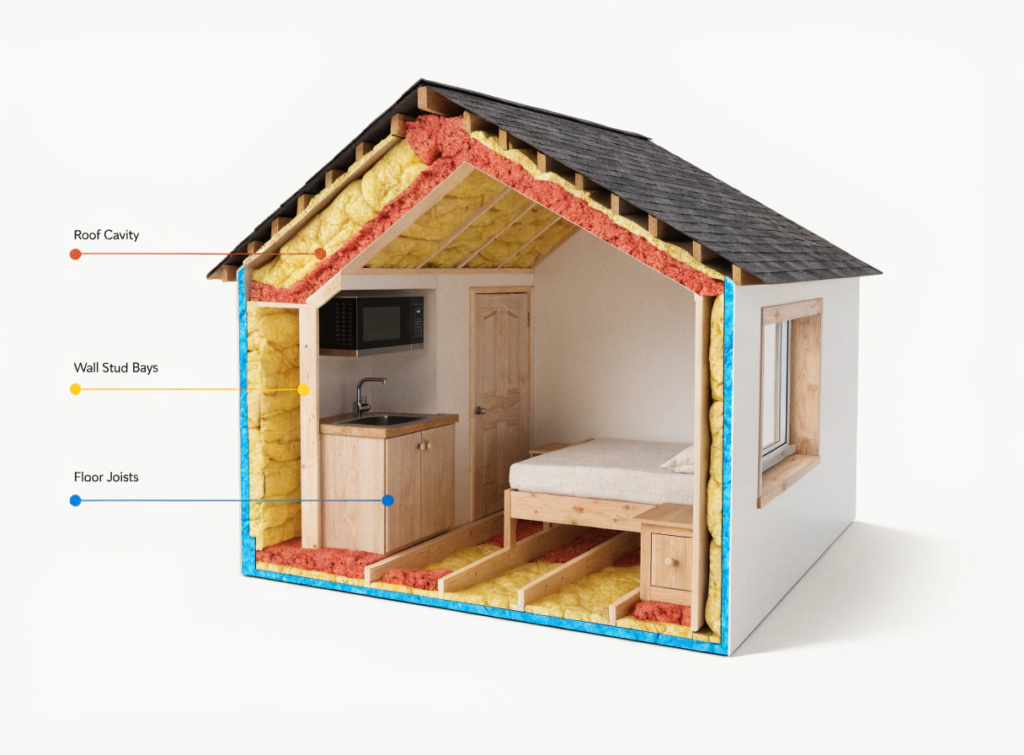
Each part of your tiny home needs a slightly different approach. Here’s what works best in each area:
Walls
- Fill wall cavities completely with no gaps or compressed areas — any void is a heat leak.
- Use closed-cell spray foam for the tightest air seal, or mineral wool batts for a DIY-friendly fit that holds its shape.
- Seal around electrical outlets, window frames, and wall joints with foam sealant before applying insulation.
- Consider adding a layer of rigid foam board on the exterior of the wall framing to reduce thermal bridging through wall studs.
Floors
- Rigid foam boards between floor joists are the most common and effective approach — they handle moisture well and provide a solid R-value.
- Seal every seam and edge with spray foam to stop cold air from sneaking in through gaps.
- Install a vapor barrier under the insulation to prevent moisture from rising up from beneath the trailer or foundation.
- Pay close attention to metal trailer frame sections — these create thermal bridges and need extra sealing.
Roof and Ceiling
- The roof is where most heat is lost, so use your highest R-value material here. Most climate zones call for R-30 minimum, and colder zones need R-60.
- Closed-cell spray foam is particularly effective for roofs — it seals the surface completely and doubles as a vapor barrier.
- Use 2×6 rafters if possible to create deeper cavities for thicker insulation layers.
- Seal around any skylights, vents, or roof penetrations with foam or caulk before applying insulation.
Windows and Doors
- These are major sources of drafts. Apply foam sealant or weatherstripping around all frames.
- Choose double-glazed windows wherever budget allows — they cut heat loss significantly compared to single-pane glass.
- Add thermal curtains as a low-cost extra layer of protection during colder months.
The Bottom Line on Tiny Home Insulation
Good insulation is one of the smartest investments you can make in a tiny home. According to the U.S. Department of Energy, proper insulation can reduce heating and cooling costs by up to 30% — savings that add up quickly in a small, energy-conscious home.
You don’t need to spend top dollar on every surface. Match your material choices to your climate, prioritize the areas where heat loss is greatest (the roof first, then walls, then floors), and seal air leaks before anything else goes in. Whether you go full DIY or bring in a professional for the trickier parts, a well-insulated tiny house pays for itself in comfort, lower bills, and a smaller footprint. When you’re ready to plan your build, use this guide as your starting point — because getting tiny house insulation cost right from the start means fewer surprises later.
Frequently Asked Questions
How much does it cost to insulate a tiny house on average?
Most tiny home insulation projects cost between $500 and $3,500 total, depending on home size, material choice, and whether you hire a professional. Upgrading from basic to high-performance insulation typically adds about $2,000 to a build’s total cost.
What is the cheapest insulation for a tiny house?
Fiberglass batts and rigid foam boards are the most affordable options. Fiberglass batts start at around $0.30 per square foot installed. Rigid foam boards begin at about $0.25 per square foot, making them a budget-friendly pick — especially for floors.
Can I insulate a tiny house myself?
Yes. Fiberglass batts, rigid foam boards, mineral wool, and denim/cotton batts are all DIY-friendly materials that don’t require special equipment. Spray foam insulation, on the other hand, requires professional equipment and trained application to work correctly.
What R-value do I need for a tiny house?
R-value targets depend on your climate zone. As a general guide, most tiny homes need R-13 to R-21 for walls, R-30 or higher for the roof, and R-13 to R-38 for floors depending on how cold your region gets. You can find specific targets for your climate zone at exploretinyhouse.com.
Is spray foam insulation worth the cost for a tiny house?
For most tiny homes, yes. Closed-cell spray foam delivers the highest R-value per inch (R-5.6 to R-8), seals air and moisture, and can reduce energy bills by up to 30%. The higher upfront cost often pays off within a few years through lower heating and cooling bills.
How does a tiny house on wheels change insulation costs?
Tiny homes on wheels face additional challenges, including metal trailer frames that create thermal bridges. Addressing these requires extra sealing materials and careful planning. Weight also matters — lighter materials like spray foam and rigid foam boards are better for THOW builds since they don’t add unnecessary load to the trailer.
What is the most eco-friendly insulation for a tiny house?
Sheep’s wool, denim/cotton batts, and cellulose insulation are the top eco-friendly picks. Sheep’s wool is renewable and manages moisture naturally. Cellulose is made from recycled paper and treated to resist fire. Denim batts use recycled fabric and are safe to install without protective gear.
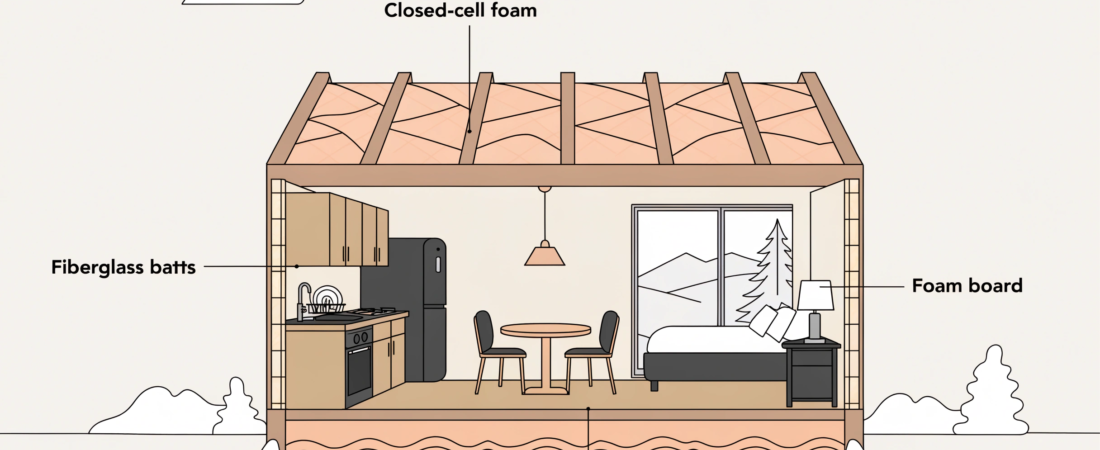
Section Image 3 (Walls, Floors, Roof Tips)
A detailed cutaway illustration of a tiny house showing insulation placement in the roof cavity, wall stud bays, and floor joists. Color-coded by insulation type with subtle annotation labels. Clean architectural diagram style on a light background.