

How to insulate a tiny house is one of the first questions you should ask before you build — or move in. Good insulation keeps you warm in winter, cool in summer, and can cut energy bills by up to 30%, says the U.S. Department of Energy. But tiny homes come with real challenges: shallow wall cavities, tight spaces, and sometimes the need to move between climate zones. This guide covers every key area — walls, roof, and floor — plus the best insulation materials and easy tips to stop moisture problems before they start.
- Why Insulation Matters So Much in a Tiny Home
- Best Insulation Types for a Tiny House
- How to Insulate Tiny House Walls
- How to Insulate the Roof and Ceiling
- How to Insulate the Floor of a Tiny House
- R-Value Quick Reference Chart
- How to Stop Moisture and Condensation Problems
- Tiny House on Wheels vs. on a Foundation: What Changes?
- Quick Recap: What Matters Most
Why Insulation Matters So Much in a Tiny Home
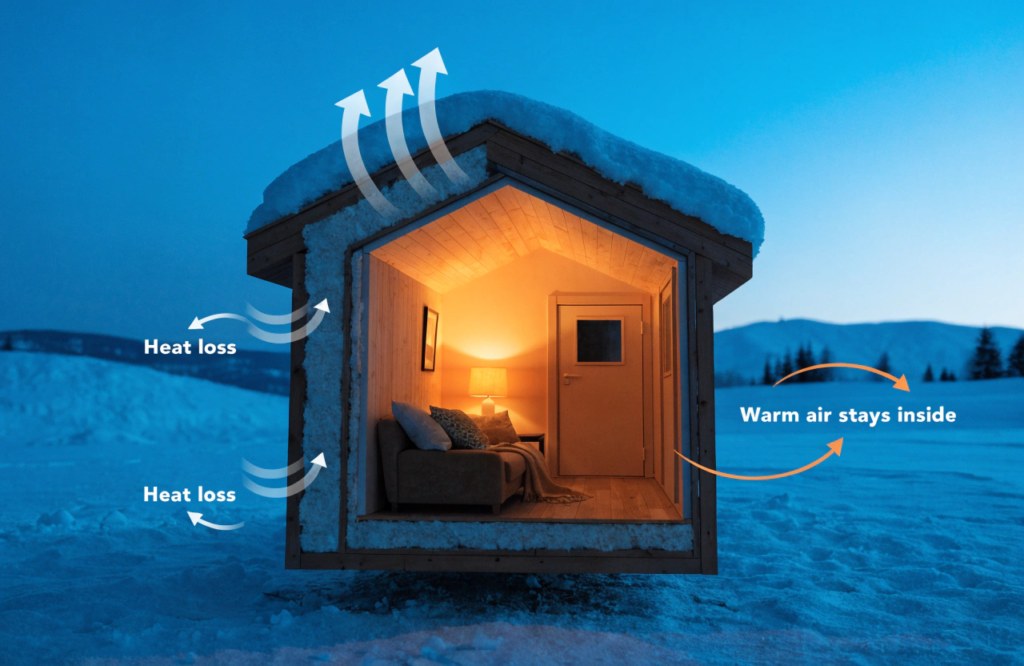
Tiny houses lose heat fast. Because of their high surface-area-to-volume ratio, cold air gets in quickly and warm air slips out just as fast.
Here’s where heat typically escapes:
- Roof: 30–40%
- Walls: 20–30%
- Floor: 15–25%
- Windows, doors, and air leaks: 20–30%
Your insulation acts like a complete wrapper around your home. Builders call this the thermal envelope. When that envelope has gaps, your heating and cooling system works overtime — and your bills go up.
The good news? Tiny homes cost less to insulate than standard houses. You just need to pick the right materials and put them in the right places.
Best Insulation Types for a Tiny House
Not all insulation performs the same. In a tiny house, every inch of wall space counts. You want materials with the highest R-value per inch possible.
R-value measures how well a material blocks heat transfer. The higher the number, the better it performs.
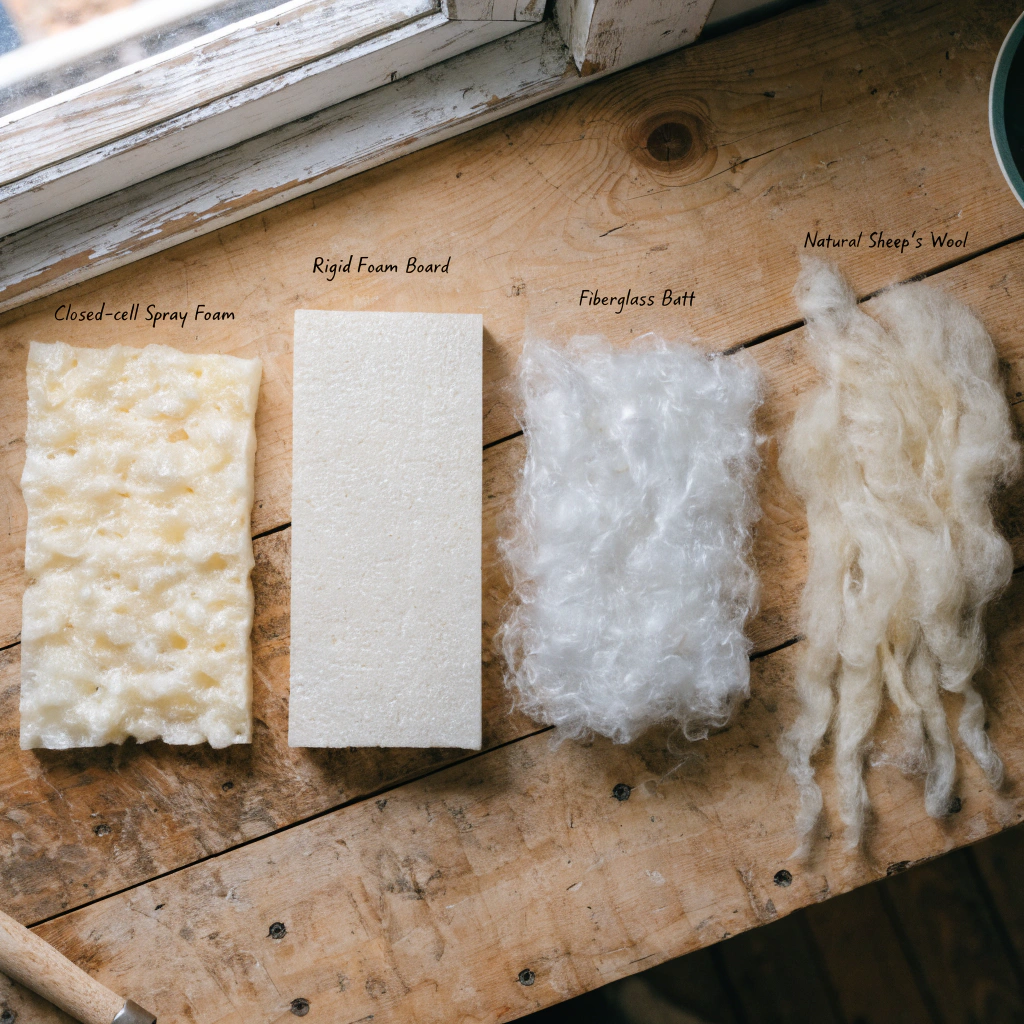
Here are the four most common options:
Closed-Cell Spray Foam
This is the top performer. Closed-cell spray foam hits R-5.6 to R-8.0 per inch — ideal for shallow wall cavities. It expands to fill every gap, acts as an air barrier, and resists moisture. The downside: it costs more, around $0.90 to $1.10 per board foot installed, and needs professional equipment.
Open-cell spray foam is cheaper at R-3.5 to R-3.7 per inch, but it lets vapor pass through. In humid climates, you’ll need a separate moisture plan.
Rigid Foam Board
Rigid foam panels offer R-3.8 to R-6.5 per inch depending on the type:
- EPS (expanded polystyrene): Budget-friendly, vapor-open
- XPS (extruded polystyrene): Better moisture resistance
- Polyiso: Highest R-value per inch, great above grade
Rigid foam works well on exterior walls to cut thermal bridging — where heat sneaks through the framing instead of the insulation. It’s also a solid pick for floors and roof assemblies.
Fiberglass Batts
Fiberglass is the most affordable at R-2.9 to R-3.8 per inch. A standard R-13 batt fits neatly in a 2×4 cavity and is the lightest option out there — a big plus for tiny houses on wheels. The catch: gaps or compressed batts hurt performance fast. For mild climates and tight budgets, fiberglass still works well.
Sheep’s Wool and Natural Insulation
Wool batts come in at R-3.5 to R-3.8 per inch. They’re non-toxic, eco-friendly, and handle moisture swings better than most synthetic options — absorbing and releasing humidity without losing much insulating power. They cost more than fiberglass, but they’re a great fit for builders who want low-toxicity materials in a small, enclosed space.
How to Insulate Tiny House Walls
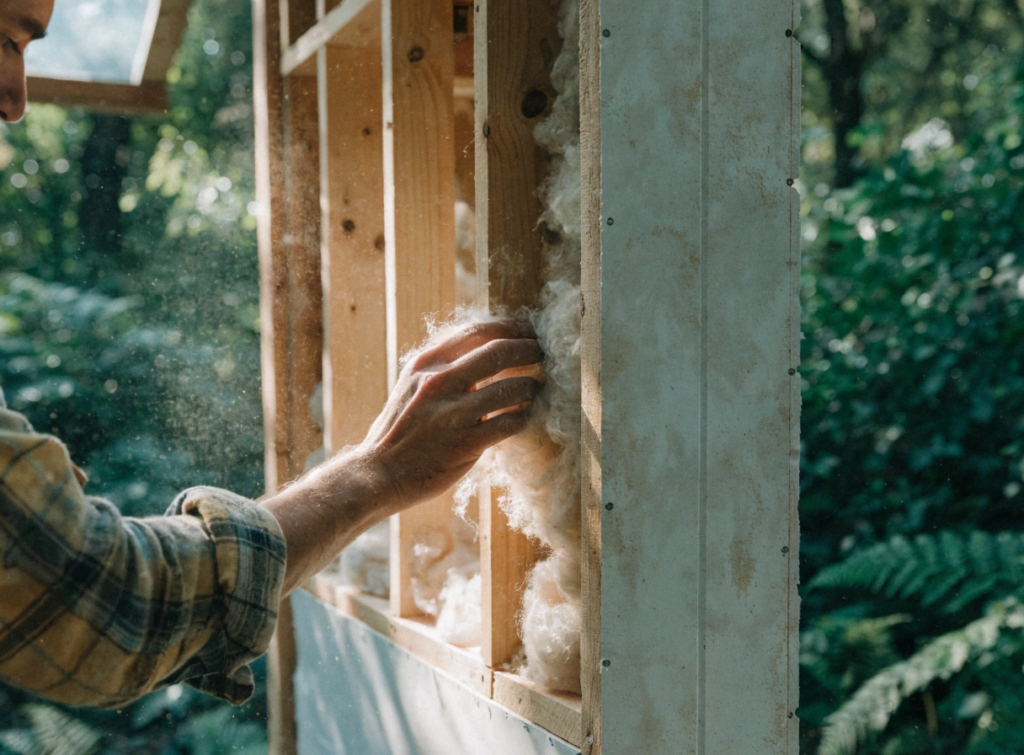
Most tiny house walls use 2×4 studs, leaving just 3.5 inches of cavity space. That’s not much. Your insulation has to punch above its weight.
Target R-values for walls:
- Warm climates (Zones 1–3): R-13 to R-15
- Cold climates (Zones 4–6): R-19 to R-21
- Very cold climates (Zones 7–8): R-20+
One of the biggest wall problems is thermal bridging — heat traveling through wood or metal framing instead of the insulation. This can drop your wall’s effective R-value by 15–30%. To fix it, many builders add a layer of continuous rigid foam on the exterior of the sheathing. Even 1 to 1.5 inches of polyiso can push real-world performance into the mid-20s.
Your best wall insulation options:
- Closed-cell spray foam in a 2×4 cavity: R-19 to R-24, plus a built-in air barrier
- Fiberglass or rock wool batts: R-13 to R-15 at a lower cost
- 2×4 cavity + 1–2 inches exterior rigid foam: Total effective R of R-20 to R-25
If your framing allows it, 24-inch-on-center advanced framing gives you more insulated area with the same wall thickness. Many custom tiny home builders swear by it.
How to Insulate the Roof and Ceiling
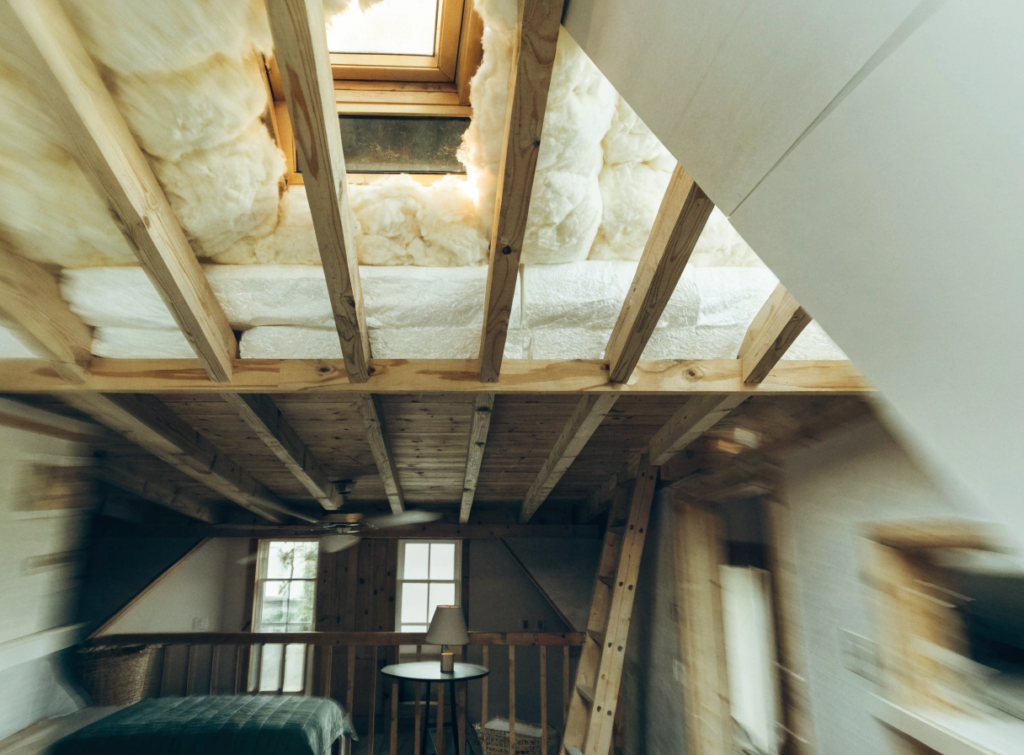
The roof is where you need your highest R-values. Heat rises, and a poorly insulated roof bleeds warmth fast. At the same time, tiny houses on wheels are limited to a legal road height of 13’6″ — so your roof assembly can’t be too thick.
Target R-values for the roof:
- Warm zones (1–3): R-30 minimum
- Cold zones (4–6): R-38+
- Very cold zones (7–8): R-49 to R-60
Closed-cell spray foam shines here. Just 3 inches gives you around R-21. Add 2 inches of rigid foam board above the deck and you can hit R-35 or higher — without losing much headroom.
For vented “cold” roof designs, install proper baffles to stop moisture from getting trapped. Unvented roofs with spray foam need a smart vapor retarder to stay dry. Condensation inside the roof assembly is one of the most common — and costly — tiny house build mistakes, so don’t cut corners here.
How to Insulate the Floor of a Tiny House
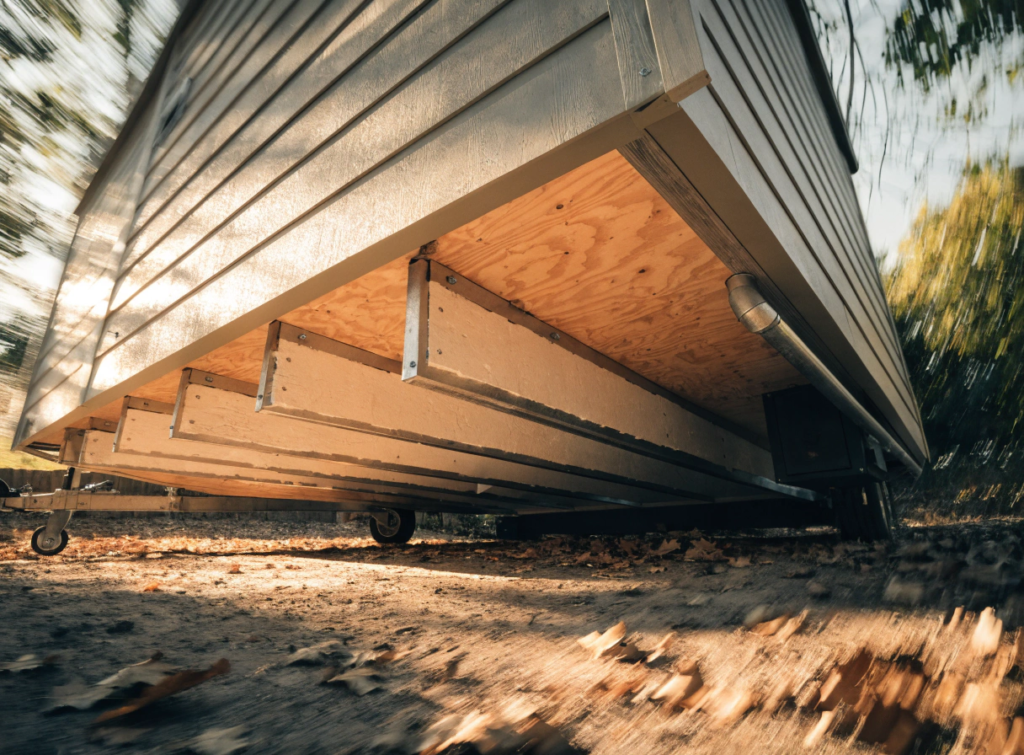
The floor might feel like the last priority, but it handles 10 to 25 percent of your total heat loss — especially when your home sits over open air on a trailer.
Target R-values for the floor:
- Mild climates: R-19 minimum
- Cold climates: R-25 to R-30+
Common floor insulation methods:
- Rigid foam boards cut to fit between trailer flanges
- Fiberglass or rock wool batts held up by mesh or strapping
- Closed-cell spray foam sprayed across the entire underside of the floor
The metal trailer frame creates serious thermal bridging. Cover metal frame members with rigid foam where you can, and add insulated skirting around the base during winter — it makes a real difference.
Always put a vapor barrier under your floor insulation to block ground moisture. If rigid foam is exposed on the underside, protect it with plywood or metal sheeting. Road debris will destroy it fast otherwise.
R-Value Quick Reference Chart
R-value is the most important number in tiny house insulation. It shows how well a material blocks heat flow. The higher the number, the better — but tiny homes often have shallow cavities, weight limits, and height restrictions to work around.
Here’s a quick guide to recommended R-values by climate:
| Climate Band | Walls | Roof | Floor |
|---|---|---|---|
| Warm (Zones 1–3) | R-13 to R-15 | R-30 | R-13 to R-19 |
| Mixed/Cold (Zones 4–6) | R-19 to R-21 | R-38 to R-49 | R-19 to R-30 |
| Very Cold (Zones 7–8) | R-20+ | R-49 to R-60 | R-30 to R-38 |
Keep in mind: R-value only measures conductive heat flow. Air leaks and moisture control matter just as much in real-world performance. A well-sealed R-15 wall often beats a leaky R-21 wall.
For a full breakdown of R-value targets by climate zone and material, check out this guide on tiny house insulation R-values.
How to Stop Moisture and Condensation Problems
Moisture is the biggest threat to your insulation. When warm, humid air hits a cold surface, it condenses — and that trapped water can rot wood, grow mold, and kill your insulation’s performance over time.
Here’s how to stay ahead of it:
Seal air leaks first. Most moisture problems start with air coming in, not vapor moving through walls. Common leak spots in tiny houses:
- Around window and door frames
- Electrical and plumbing penetrations
- Loft floor transitions
- The rim joist area over the trailer frame
- Floor joist connections
Use canned spray foam for small gaps, caulk at trim and sill joints, tape at sheathing seams, and gaskets around electrical boxes. A smoke pen or thermal camera is a cheap way to find hidden leaks before you close up the walls. The Building Science Corporation has great free resources on air sealing if you want to go deeper.
Manage vapor the smart way. In cold climates, place a smart or standard vapor retarder on the warm side of the insulation. In hot, humid climates, a more vapor-open assembly usually works better. The wrong call can trap moisture exactly where you don’t want it.
Ventilate properly. Even a tight tiny house needs fresh air. At minimum, install a bathroom exhaust fan and a range hood. For very tight builds, a small heat recovery ventilator (HRV) keeps air quality high without wasting energy.
Add insulated skirting. Parked in winter? An insulated skirt around the base blocks cold ground air from creeping under your floor. It’s a simple, affordable upgrade that cuts cold floor issues fast.
Tiny House on Wheels vs. on a Foundation: What Changes?
Where your tiny house sits changes your insulation strategy quite a bit.
Tiny Houses on Wheels (THOW)
Weight matters a lot. Every pound counts when you’re working within your trailer’s gross vehicle weight rating (GVWR). Here’s how common materials stack up by weight:
- Fiberglass batts: 0.5–1 lb/cu ft — lightest option
- Closed-cell spray foam: ~3 lb/cu ft
- Rock wool: 4–8 lb/cu ft — heaviest
Height limits (13’6″ road legal) also restrict how thick your roof can be. That’s why high-R-per-inch materials like closed-cell spray foam are especially valuable for THOW builds. The insulation also needs to handle road vibration over time. Sprayed and bonded foam holds up better than loosely fitted batts over thousands of miles.
Tiny Houses on a Foundation
You get a lot more freedom here. Thicker walls (2×6 framing), heavier materials, and deeper roof assemblies are all possible. Park model tiny houses can be insulated much like a small cottage — R-23 rock wool in 2×6 walls, rigid foam above the roof deck, and a deep floor assembly over a full foundation.
Building a cold-climate foundation tiny house? Target R-21+ walls, R-49 roof, and R-30 floor — all very reachable goals without the weight and height trade-offs that THOW builders face.
Quick Recap: What Matters Most
Good insulation is about more than staying warm. It’s about energy efficiency, lower monthly costs, moisture control, and a tiny home that stays comfortable year-round.
Here’s what to keep in mind:
- Pick insulation with the highest R-value per inch your budget allows
- Seal air leaks before and after installing insulation
- Cut thermal bridging with continuous exterior rigid foam
- Match your R-value targets to your climate zone
- Use a vapor barrier and ventilate properly to block moisture damage
Start with the roof, move to the walls, then tackle the floor. That order gives you the biggest return on your insulation investment, every time.
Now you know exactly how to insulate a tiny house the right way — pick your materials, plan your layers, and build a home that stays comfortable no matter where life takes you.